Run winget install --id 7zip.7zip -e --source winget in PowerShell or Command Prompt to install 7-Zip on Windows 11 or Windows 10 with a single command.
This guide covers opening PowerShell, the install command and its switches, adding 7-Zip to the system path, the main 7z command line options, and how to update or uninstall it.
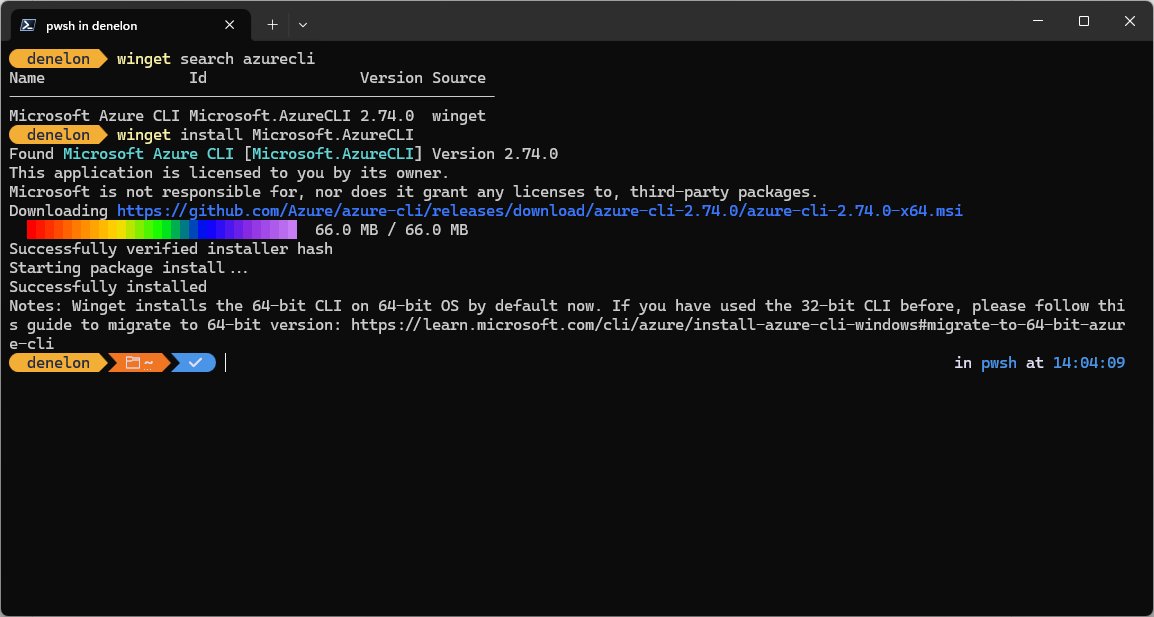
Install 7-Zip on Windows 11 with one winget command
WinGet, the Windows Package Manager, is built into Windows 11 and modern versions of Windows 10 as part of App Installer. It downloads the 7-Zip installer and runs it for you.
winget install --id 7zip.7zip -e --source winget --accept-package-agreements --accept-source-agreements--id 7zip.7zip picks the 7-Zip package by its ID, -e requires an exact match, --source winget skips the Microsoft Store source, and the two accept switches answer the licence prompts so the install runs without stopping.
You should see: WinGet shows the download, then Successfully installed. 7-Zip appears in the Start menu and in File Explorer's right-click menu.
The shorter winget install 7zip.7zip also works when it matches only one package. If Windows asks for permission to make changes, select Yes; declining stops the install.
Step 1: Access the PowerShell
WinGet runs from PowerShell, Windows Terminal or Command Prompt. An administrator PowerShell window avoids the elevation prompt during the install.
- Right-click the Start button.
- Select Terminal (Admin) on Windows 11, or Windows PowerShell (Admin) on Windows 10.
- Select Yes in the User Account Control prompt.
- Type
winget --versionand press Enter to confirm WinGet is available. - If Windows says winget is not recognized, update App Installer from the Microsoft Store and open a new window.
WinGet needs Windows 10 version 1809 (build 17763) or later. On a brand-new PC it becomes available only after the first user sign-in, once the Microsoft Store has registered it.
Step 2: 7-Zip installation on Windows 11
Search first if you want to see the package before installing it. The search shows the name, ID, current version and source.
- Type
winget search 7zipand press Enter. - Find 7-Zip in the Name column and confirm the Id column shows
7zip.7zipwith source winget. - Type
winget install --id 7zip.7zip -e --source wingetand press Enter. - Type Y and press Enter if WinGet asks you to accept the source agreement.
- Wait for
Successfully installed, then close the window. - To install without the installer window, add
--silentto the same command.
The same command works on Windows 10. WinGet picks the installer that matches your PC, such as x64 or ARM64, and installs the latest version, 7-Zip 26.05 at the time of writing.
Step 3: Run 7-Zip to compress or decompress files
After the install, 7-Zip adds its own commands to File Explorer and a 7-Zip File Manager app. You can use it without the command line.
- Open File Explorer and right-click the files or folder you want to compress.
- On Windows 11, select Show more options to see the full menu.
- Point to 7-Zip and select Add to archive.
- Choose 7z or zip in Archive format, set a Compression level, and select OK.
- To extract, right-click an archive, point to 7-Zip, and select Extract Here or Extract files.
- To browse an archive first, open 7-Zip File Manager from the Start menu and double-click the archive.
The same menu also handles splitting and combining, so you can use 7-Zip for every archive task once it is installed.
Step 4: Add 7-Zip to system path
The 7-Zip installer puts 7z.exe in C:\Program Files\7-Zip but does not add that folder to the Path variable. Add it so 7z works from any folder.
- Open Start, search for Environment Variables, and select Edit the system environment variables.
- In the System Properties window, select Environment Variables.
- Under System variables, select Path and then select Edit.
- Select New and type
C:\Program Files\7-Zip. - Select OK to save the change and close every dialog.
- Close and reopen PowerShell or Command Prompt so it reads the new Path.
Without this step, run 7-Zip by its full path instead, for example & "C:\Program Files\7-Zip\7z.exe" in PowerShell.
Step 5: Use 7z command line options
Every 7z command follows the same pattern: 7z <command> [switches] <archive> [files]. The command is a single letter, and switches start with a hyphen.
- Open PowerShell or Command Prompt in the folder that holds your files, or use
cd /Dto change to it. - Type
7zand press Enter to print the full list of commands and switches. - Pick a command:
ato add files to an archive,xto extract with folders,lto list contents,tto test an archive. - Add switches such as
-tfor the archive type,-mxfor the compression level, or-pfor a password. - Give the archive name, then the files or folders to include.
- Press Enter and wait for
Everything is Ok.
7-Zip compresses subfolders without the -r switch. Use -r only to collect files matching a pattern, such as every .txt file under a folder: 7z a -r c:\a.zip c:\dir\*.txt.
Primary 7-Zip command line usage
These are the commands most people need. Replace the names with your own files and folders.
| Task | Command | What it does |
|---|---|---|
| Create a compressed archive | 7z a backup.7z C:\Data |
Compresses the folder and all its subfolders into a 7z archive |
| Extract an archive | 7z x backup.7z -oC:\Restore |
Extracts with the original folder structure into C:\Restore |
| List the files in an archive | 7z l backup.7z |
Shows names, sizes and dates without extracting |
| Compress with a specific format | 7z a -tzip backup.zip C:\Data |
Creates a ZIP file instead of 7z |
| Set the compression level | 7z a -mx9 backup.7z C:\Data |
Uses maximum compression; -mx1 is fastest |
| Create a password-protected archive | 7z a -p -mhe=on secret.7z C:\Data |
Prompts for a password, encrypts with AES-256 and hides file names |
| Test an archive | 7z t backup.7z |
Checks the archive for CRC errors |
Use * rather than *.* as a wildcard. 7-Zip treats *.* as files that have an extension, so files without one are skipped.
Install 7-Zip without winget
If WinGet is not available, use the installer from the official 7-Zip website. It also supports a silent install for scripts.
| Your situation | Use this | Command or action |
|---|---|---|
| Windows 11 or 10 with WinGet | WinGet | winget install --id 7zip.7zip -e --source winget |
| No WinGet, normal install | The .exe installer from 7-zip.org | Download the 64-bit x64 (or ARM64) installer and select Install |
| Silent install from a script with the .exe | Installer switches | 7z2605-x64.exe /S /D="C:\Program Files\7-Zip" (switches are case-sensitive) |
| Silent install with the .msi | MSI switches | msiexec /i 7z2605-x64.msi /q INSTALLDIR="C:\Program Files\7-Zip" |
| Command line only, no install | 7-Zip Extra | The standalone console version from the official download page |
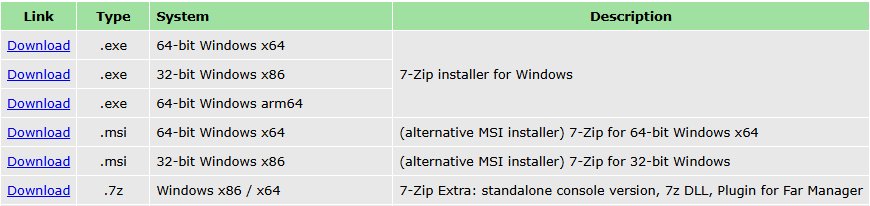
The 7-Zip site recommends the .exe installer over the .msi. If you prefer a normal download, the 7-Zip download page for Windows lists every edition.
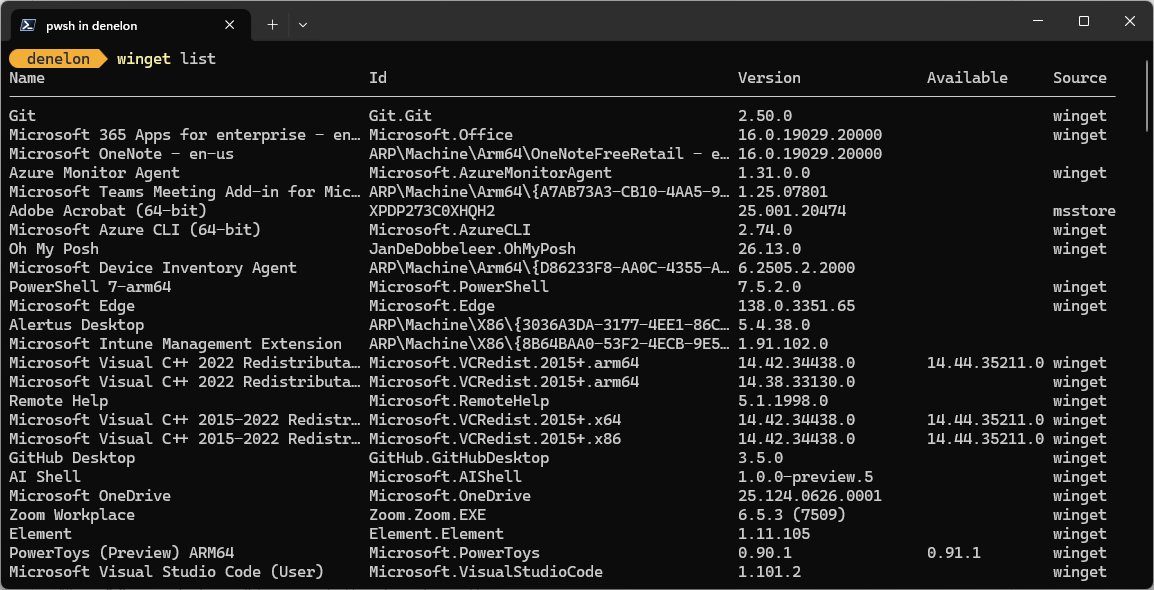
Find the installed 7-Zip version with winget
winget list --id 7zip.7zipLists the installed 7-Zip package with its version and whether an update is available.
You should see: A row for 7-Zip with ID 7zip.7zip and a version number. Running 7z alone prints the same version in its first line.
Update 7-Zip with winget upgrade
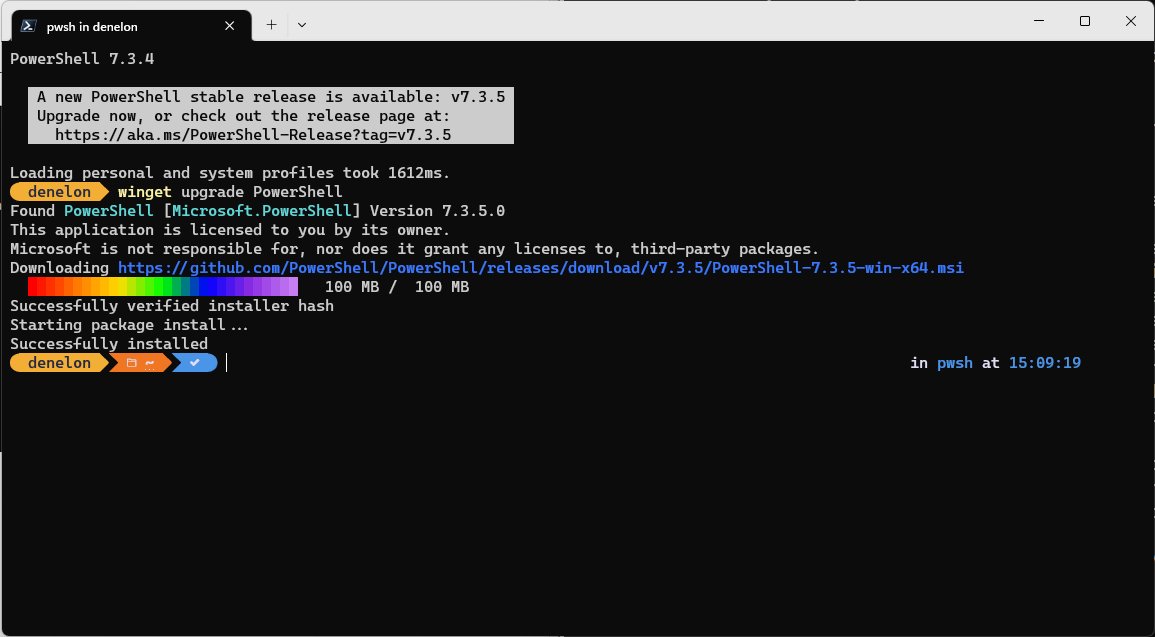
- Open PowerShell or Terminal as administrator.
- Type
winget upgrade --id 7zip.7zip -eand press Enter. - Wait for
Successfully installed; WinGet replaces the old version in place. - To update every app WinGet manages at once, run
winget upgrade --allinstead.
How to uninstall 7-Zip on Windows 11
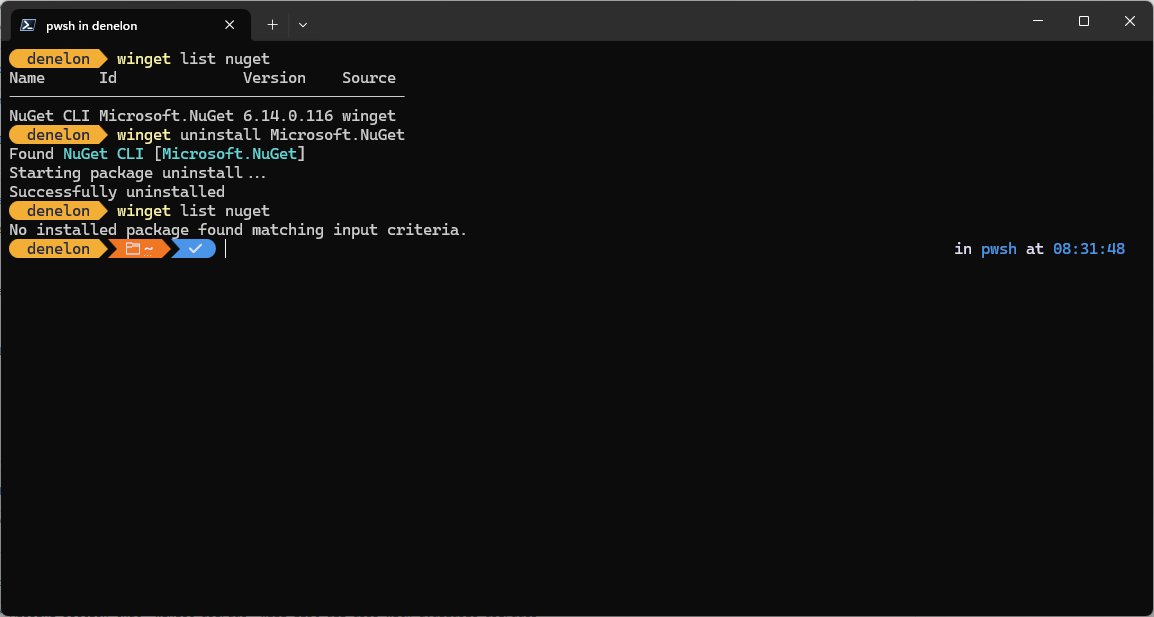
winget uninstall --id 7zip.7zip -e --source wingetRemoves 7-Zip. --source winget avoids a Microsoft Store agreement prompt during the uninstall.
You should see: WinGet reports Successfully uninstalled and the 7-Zip entries disappear from the right-click menu.
You can also uninstall from Start > Settings > Apps > Installed apps: select More next to 7-Zip, then Uninstall. Remove C:\Program Files\7-Zip from Path afterwards if you added it.
Fix winget or 7z is not recognized
"winget is not recognized as the name of a cmdlet"
App Installer is missing, out of date, or not yet registered for this account.
- Update App Installer from the Microsoft Store.
- On a new PC, sign in once and wait for the Store to register WinGet.
- Run
Add-AppxPackage -RegisterByFamilyName -MainPackage Microsoft.DesktopAppInstaller_8wekyb3d8bbwein PowerShell, then open a new window.
"7z is not recognized as an internal or external command"
The 7-Zip folder is not in the Path variable, or the window was open before you changed it.
- Add
C:\Program Files\7-Zipto Path as shown in Step 4. - Close every terminal window and open a new one.
- Run
7zagain; the version line confirms it works.
WinGet shows several matching packages
A plain name query matches more than one package or source.
- Use the exact ID with
--id 7zip.7zip -e. - Add
--source wingetso the Microsoft Store results are skipped.
The install fails after a permission prompt
The installer needs administrator rights and the prompt was declined.
- Open Terminal (Admin) or Windows PowerShell (Admin).
- Run the install command again and select Yes if prompted.
Install 7-Zip on Windows 11 FAQ
How do I install 7-Zip on Windows 11?
Open Terminal as administrator and run winget install –id 7zip.7zip -e –source winget. WinGet downloads and installs the latest 7-Zip. Without WinGet, download the 64-bit installer from 7-zip.org and run it.
Does 7-Zip work with Windows 11?
Yes. The official 7-Zip site lists Windows 11 and Windows 10 as supported, with installers for 64-bit x64, 32-bit x86 and 64-bit ARM64 PCs. After installation it adds its commands to the File Explorer right-click menu.
Does Windows 11 come with 7-Zip?
No. 7-Zip is a separate free program by Igor Pavlov and is not part of Windows. Install it with WinGet or the official installer to get the 7-Zip File Manager, the right-click menu and the 7z command line tool.
What is 7-Zip on Windows 11?
7-Zip is a free, open-source file archiver. It creates 7z, ZIP, TAR, GZIP, BZIP2, XZ and WIM archives, opens many more formats including RAR and ISO, and supports AES-256 encryption for 7z and ZIP files.
How do I download 7-Zip for Windows 11?
Download it from the official site, 7-zip.org. Choose the 64-bit x64 .exe installer for most PCs, or the ARM64 installer for ARM-based Windows PCs. WinGet downloads the same installer automatically when you use the install command.
How do I uninstall 7-Zip on Windows 11?
Run winget uninstall –id 7zip.7zip -e –source winget in PowerShell or Terminal. You can also open Settings > Apps > Installed apps, select More next to 7-Zip, and choose Uninstall.
Is 7-Zip free to use?
Yes. 7-Zip is free, open-source software, mostly under the GNU LGPL licence. You can use it on any computer, including in a company, without registering or paying.
How do I use 7-Zip on Windows 11?
Right-click files in File Explorer, select Show more options, point to 7-Zip, and choose Add to archive or Extract Here. From the command line, use 7z a to compress and 7z x to extract.
Can I install 7-Zip silently?
Yes. Add –silent to the winget install command, or run the .exe installer with the case-sensitive /S switch. For the .msi installer, use the /q switch with INSTALLDIR to set the folder.