To get started with the Google Workspace Admin console, sign in at admin.google.com with an administrator account, then add users, secure sign-in and switch on the services your team needs.
This guide covers signing in, the menu paths for each first-week task, users, groups and organizational units, security and device settings, billing and licenses, and what to do when sign-in fails.
How to access the Admin console
The Admin console only opens for an administrator account. A personal account that ends in @gmail.com cannot reach it.
- Open any web browser and go to admin.google.com.
- On the sign-in page, enter the email address of your admin account, such as [email protected].
- Enter the password for that account and complete 2-Step Verification if you are asked.
- If a list of Google Accounts appears, choose the admin account, not a personal @gmail.com account.
- Wait for the Admin console Home page to load. That page is your starting point for every task below.
To stay signed in to a personal account and your admin account together, add both to the same browser and switch between them without signing in each time.
What you need before you start
| Requirement | Why it matters |
|---|---|
| An administrator account on your organization's domain | Only admin accounts can open admin.google.com. Ordinary user accounts see no console. |
| The right admin privilege for each task | Adding users needs a User management privilege, turning services on needs Service Settings, and contacting support needs the Support privilege. Without it, the controls stay hidden. |
| Super administrator access for security settings | Changing 2-Step Verification settings requires signing in as a super administrator. |
| Recovery phone or email on the admin account | Google's automated account recovery uses these if you forget the admin password. |
| Available licenses (Annual/Fixed-Term Plan) | On an annual plan you may need to buy licenses before you can add more users. |
What the Google Workspace Admin console is used for
The Admin console is where admins manage Google services for everyone in an organization. Each job below lives in its own area of the console.
| Main job | What you control | Console area |
|---|---|---|
| Manage people | Create, suspend, delete and restore user accounts; reset passwords; edit profiles | Directory |
| Organize settings | Organizational units and groups that decide who gets which settings | Directory |
| Switch services on or off | Gmail, Drive and Docs, Calendar, Meet, Chat and other Google services per team | Apps |
| Secure sign-in | 2-Step Verification, password rules, security health checks | Security |
| Control devices | Mobile management for Android phones, iPhones and iPads that reach work data | Devices |
| Watch activity | User reports, including 2-Step Verification enrollment | Reporting |
| Pay and plan | Subscriptions, payment plans and license counts | Billing |
| Delegate work | Prebuilt and custom admin roles for other staff | Admin roles |
Navigating the main dashboard and key menus
Every page in the console opens from Menu at the top left. The paths below are the ones Google's own help pages use for each first-week task.
| What you want to do | Menu path | Privilege needed |
|---|---|---|
| Add or edit user accounts | Menu > Directory > Users | User management |
| Create departments or teams | Menu > Directory > Organizational units | Organizational Units |
| Turn Gmail, Drive or Meet on or off | Menu > Apps > Google Workspace > Service status | Service Settings |
| Set up 2-Step Verification | Menu > Security > Authentication > 2-step verification | Super administrator |
| Review security gaps | Menu > Security > Security center > Security health | Security center |
| Manage mobile devices | Menu > Devices > Mobile & endpoints > Settings > Universal | Mobile Device Management |
| Check 2SV enrollment | Menu > Reporting > User Reports > Security | Reports |
| See subscriptions and licenses | Billing > Subscriptions | Billing management rights |
| Contact Google support | Get help at the top right of any console page | Support |
Google also publishes an Admin mobile app for Android and iOS, documented alongside the console in its help center.
Adding and managing users, groups, and organizational units
Every person needs their own user account before they can use Gmail, Drive or any other service. Never share one account between several people.
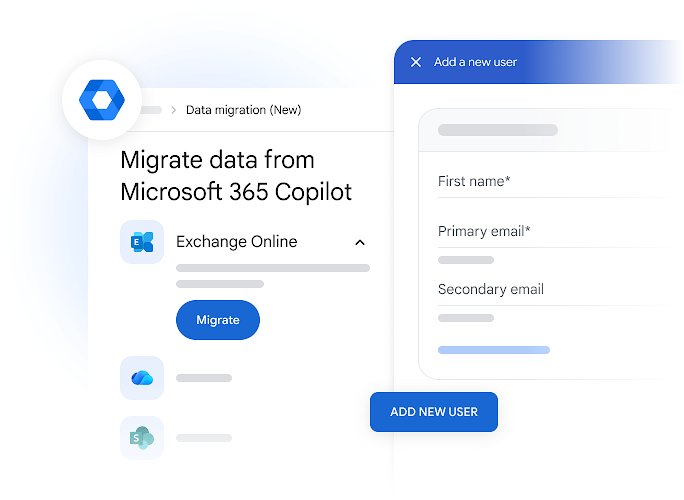
- Go to Menu > Directory > Users.
- At the top of the user list, click Add new user.
- Enter the first and last name, then accept or change the suggested Primary email.
- Add a Secondary email where the person can receive their new account details.
- Optionally click Manage user's password, organizational unit, and profile photo to pick an organizational unit and password option.
- Click Add New User.
- Click Preview And Send to email the sign-in details, or Copy Password to share it another way, then click Done.
The welcome email contains a password link that expires after 48 hours. Services can take up to 24 hours to become available to a new user.
To remove someone, delete, suspend or archive their account from the same Users list. A deleted user can be restored within 20 days, which you need to do if you still want to transfer their data.
How to create an organizational unit for a team
All users and devices start in the top-level organizational unit, so every setting you change applies to everyone. Child units let one department get different settings.
- Go to Menu > Directory > Organizational units.
- Hover over the parent organization and click Create new organizational unit.
- Enter a name, such as Finance, in Name of organizational unit. The / character is not allowed.
- Optionally add a Description.
- To place it under a different parent, click Edit under Parent organizational unit, choose the parent and click Done.
- Click Create, then move users or devices into the new unit.
Child units inherit their parent's settings until you override a setting for them. You cannot move yourself, the administrator, into another organizational unit.
Groups or organizational units: which one to use
| Your situation | Use this | Why |
|---|---|---|
| A department needs different settings from everyone else | Organizational unit | Each user belongs to exactly one unit and inherits its settings |
| A team needs one email address or a shared calendar | Group | A group gives members a single address for mail, meetings and sharing |
| A few people across departments need an exception | Configuration or access group | Group settings override organizational units without changing your structure |
| One user or device needs unique settings | Organizational unit for just that user | Google recommends a dedicated unit for single-user settings |
| You want to use a group to control a service | Group created in the Admin console | Groups made in Google Groups cannot be used to configure services |
A new group can take up to 24 hours to appear in the Groups directory. Wait a few minutes before sending its first email, or the message may bounce.
Configuring security, apps, and device settings
Start with 2-Step Verification. Google now enforces it for administrator accounts, and a stolen admin password exposes every mailbox and file in the organization.
- Sign in as a super administrator and go to Menu > Security > Authentication > 2-step verification.
- Optionally select an organizational unit or configuration group at the side to limit the change to some users.
- Check Allow users to turn on 2-Step Verification and leave Enforcement set to Off while people enroll.
- Click Save and tell your users to turn on 2-Step Verification in their own accounts.
- Once users are enrolled, return to the same page and set Enforcement to On, or choose Turn on enforcement from date.
- Optionally set a New user enrollment period so new staff have time to enroll, then click Save.
Enforcement from a date starts within 24 to 48 hours of the date you pick. If you choose a method that blocks text and phone codes, move those users to another method first or they will be locked out.
How to turn a Google service on or off
- Go to Menu > Apps > Google Workspace > Service status.
- Click the service you want to change, such as Gmail or Google Meet.
- Click Service status.
- To limit the change to one department, select its organizational unit at the side.
- Click On for everyone or Off for everyone, then click Save.
Changes can take up to 24 hours, though they usually apply sooner. If you turn on Google Chat, users who prefer the desktop app can set Google Chat to open at startup.
How to turn on basic mobile device management
Basic mobile management is on by default and covers Android phones, iPhones and iPads. Turn it back on if a previous admin switched it off.
- Go to Menu > Devices > Mobile & endpoints > Settings > Universal.
- Click General > Mobile management.
- Optionally select an organizational unit at the side to apply it to one team.
- Select Basic.
- Click Save.
Basic management lets you set device password rules and wipe a work account from a lost phone. Advanced management adds app management and device audits.
Managing billing, licenses, and support
Your payment plan decides how licenses work. Check which plan you are on before adding or removing people, because the rules differ.
| Flexible Plan | Annual/Fixed-Term Plan | |
|---|---|---|
| Commitment | None; cancel any time | One year or more |
| Adding users | Any time; your monthly bill rises automatically | Any time, but you may need to buy licenses first |
| Removing users | Any time; the bill drops | Only at renewal; you pay for every purchased license until then |
| Business Starter price (US) | $8.40 per user per month | $7 per user per month |
| Business Standard price (US) | $16.80 per user per month | $14 per user per month |
| Business Plus price (US) | $26.40 per user per month | $22 per user per month |
| Where to check | Billing > Subscriptions | Billing > Subscriptions |
For support, click Get help at the top right of the console, describe the problem, then type Contact support to reach a person by chat or email. You need the Support administrator privilege, and Essentials Starter must upgrade to Enterprise Essentials to get support.
Check the Google Workspace status dashboard first when Gmail or Calendar fail for everyone at once. It shows known outages.
How to check your first setup worked
- Go to Menu > Directory > Users and confirm each new person appears in the list.
- Ask one new user to sign in with the welcome email and open Gmail or Drive.
- Go to Menu > Reporting > User Reports > Security and check the 2-Step Verification enrollment column for each user.
- Go to Menu > Security > Security center > Security health and search for Two-step verification for admins.
- Open Menu > Apps > Google Workspace > Service status and confirm each service shows the state you set.
A user who sees a no-access message right after creation usually just needs to wait. Google allows up to 24 hours for services to reach a new account.
Fix Admin console sign-in and setup problems
You cannot sign in to the Admin console
You are using a personal @gmail.com account or a user account without admin rights.
- Go to admin.google.com and choose the account on your organization's domain.
- If the console still does not open, ask a super administrator to assign you an admin role.
- If you do not know who your administrator is, use Google's Who is my administrator help page to find out.
You forgot the administrator password
The admin account password is lost or the account has no recovery details.
- On the sign-in page, start the password reset and follow the automated recovery flow.
- Use the recovery phone number or email you added to the admin account.
- If automated recovery fails, click Contact support at the end of the flow.
- Prove you own the domain by adding the CNAME or TXT record Google gives you at your domain host.
- Click Check Again after the record propagates, which can take up to 24 hours, then select Request for Password Reset.
You cannot add a new user
Your subscription has no free user licenses left.
- Go to Billing > Subscriptions and check which subscription the new user would draw a license from.
- Delete users who no longer need a Google Workspace license.
- On an annual plan, buy more licenses before adding the user.
- For people who only need a managed account, add a free Cloud Identity subscription instead.
Frequently Asked Questions
Who can access the Google Workspace Admin console?
Only users with an administrator role can open the Admin console. A super administrator can do every task, while prebuilt or custom roles limit an admin to specific jobs, such as managing users or resetting passwords. Regular users signing in at admin.google.com see no console.
What should I set up first in the Google Workspace Admin console?
Add user accounts first, then turn on 2-Step Verification, starting with admin accounts. After that, create organizational units for departments that need different settings and switch services on or off per unit. Check billing so your license count matches your staff.
How do I add or remove users in Google Workspace?
Go to Menu > Directory > Users and click Add new user to create an account. To remove someone, delete, suspend or archive their account from the same list. A deleted user can be restored within 20 days if you still need their data.
What is the difference between groups and organizational units?
An organizational unit controls which settings and services a user gets, and each user belongs to exactly one. A group gives several people one email address for mail, meetings and sharing. Groups created in the Admin console can also override unit settings for selected people.
Where do I manage Google Workspace billing and licenses?
Manage billing and licenses under Billing > Subscriptions in the Admin console. On the Flexible Plan, adding a user raises the monthly bill automatically. On the Annual/Fixed-Term Plan, you buy licenses up front and can reduce them only at renewal.
Can I sign in to the Admin console with a Gmail account?
No. The Admin console only accepts an administrator account on your organization's domain, and that address never ends in @gmail.com. If you pick a personal account from the account list, the console will not open.
How long does it take for a new user to get access?
Google allows up to 24 hours for services such as Gmail and Drive to reach a new user account. A new account can also take up to 24 hours to appear in the searchable Directory. The welcome email password link expires after 48 hours.
Bottom Line
Sign in at admin.google.com, add your users under Directory > Users, and turn on 2-Step Verification before you touch anything else. Accounts are the prerequisite for every other setting, and admin accounts protected only by a password put every mailbox and file in the organization at risk.