Press Windows key + R, type inetcpl.cpl and press Enter to open Internet Properties, the Windows control panel that holds the system-wide proxy, security zone, cookie, TLS and reset settings once managed through Internet Explorer.
Below: every way to open it, what each of its seven tabs controls, the tasks it still handles well on Windows 11 and Windows 10, and symptom-by-symptom fixes for connection, sign-in and certificate problems.
The fastest way to open Internet Properties
The Run box is the route Microsoft's own troubleshooting articles use, and it works from the desktop or with any app open.
- Press Windows key + R to open the Run box.
- Type
inetcpl.cpl. - Press Enter or select OK.
- The Internet Properties window opens on the General tab. Select another tab across the top to reach security, privacy, connection or advanced settings.
What is inetcpl.cpl in Windows?
inetcpl.cpl is the Control Panel module behind the Internet Options item. Microsoft's Control Panel reference lists it at C:\Windows\System32\inetcpl.cpl with the canonical name Microsoft.InternetOptions. The window it opens is titled Internet Properties, which is why both names are used for the same thing. It is one of several .cpl modules still in Windows, alongside mmsys.cpl for the Sound control panel and ncpa.cpl for Network Connections.
The Internet Explorer 11 desktop app lost support on June 15, 2022, but the settings behind this panel did not go away. Internet Explorer mode in Microsoft Edge still honours the security zone and Protected Mode settings configured here, and other Windows components read its proxy and TLS options.
| Fact | Value |
|---|---|
| File | C:\Windows\System32\inetcpl.cpl |
| Control Panel item name | Internet Options |
| Window title | Internet Properties |
| Canonical name | Microsoft.InternetOptions |
| Tabs | General, Security, Privacy, Content, Connections, Programs, Advanced |
| Who still relies on it | Internet Explorer mode in Edge (zones, Protected Mode), WinHTTP proxy import, apps that follow the Windows proxy and TLS settings |
| Is it safe? | Yes. It is a signed part of Windows; opening it changes nothing until you select Apply or OK |
How to open Internet Properties using inetcpl.cpl
Every route below lands on the same Internet Properties window. The tab-number routes skip straight to the tab you need.
| Route | What to do | Best when |
|---|---|---|
| Open it from the Run dialog | Windows key + R, type inetcpl.cpl, press Enter |
Your hands are on the keyboard |
| Open it from Command Prompt, PowerShell, or Windows Terminal | Type control inetcpl.cpl and press Enter |
You are already at a prompt or writing a script |
| Open it by canonical name | Type control /name Microsoft.InternetOptions in Run or a prompt |
You want a shortcut target that survives module changes |
| Open it straight to one tab | Type control inetcpl.cpl,,4 for Connections; swap the last number for another tab (see the tab table below) |
You change the same setting often |
| Open it through Control Panel or search | Open Control Panel from the taskbar search box and select Internet Options | You prefer the mouse |
| Open it from Task Manager | Ctrl + Shift + Esc, File > Run new task, type inetcpl.cpl |
The taskbar or Start menu is not responding |
Microsoft documents the control.exe <module>.cpl,,<tab> pattern for opening a Control Panel item on a specific tab, and its reference numbers the Internet Options pages from 1 (Security) to 6 (Advanced). If you would rather browse to it, open Control Panel by any route and select Internet Options.
Internet Properties tabs and what they control
Microsoft numbers the tabs from 1 (Security) to 6 (Advanced), so the table doubles as a key for the control inetcpl.cpl,,N shortcut. Run control inetcpl.cpl with no number to open the dialog on its first tab, General.
| Tab | Page number | What it controls | Typical job |
|---|---|---|---|
| General | No number: control inetcpl.cpl opens the dialog on its first tab |
Browsing history: temporary Internet files, cookies, history and how often stored pages are checked | Clear cached data behind a stale page or a sign-in loop |
| Security | 1 | The four security zones: Internet, Local intranet, Trusted sites, Restricted sites, each with a security level | Add a site to Trusted sites or Local intranet so it can sign you in or run scripts |
| Privacy | 2 | Cookie handling, per-site cookie rules, location requests, the pop-up blocker and toolbars during InPrivate browsing | Always allow or always block cookies from one site |
| Content | 3 | Certificate options used by the legacy browser engine | Check which certificates legacy pages present |
| Connections | 4 | Dial-up, VPN and Local Area Network (LAN) Settings: proxy server, automatic detection and setup script | Set or remove a proxy |
| Programs | 5 | Programs and add-ons tied to the legacy Internet Explorer engine | Rarely needed on Windows 11 |
| Advanced | 6 | Individual switches, including the TLS protocol check boxes and Enable Enhanced Protected Mode, plus the Reset button | Confirm TLS 1.2 is on, or reset everything to defaults |
Common tasks you can perform with inetcpl.cpl
Find your job in the left column, then go straight to the tab. Step-by-step instructions for the most common ones follow.
| Your situation | Tab and control | Why this helps |
|---|---|---|
| An old web app shows stale pages or loops at sign-in | General > Browsing history > Delete… | Removes temporary Internet files, cookies and history in one pass |
| Work network needs a proxy, or a leftover proxy blocks the internet | Connections > Local Area Network (LAN) Settings | Sets or clears the proxy address, setup script and bypass list |
| An intranet site keeps asking for your password | Security > Local intranet > Sites > Advanced | Sites in the intranet zone can sign in with your Windows account |
| A business site is blocked or its scripts do not run | Security > Trusted sites > Sites | Trusted sites get their own, less restrictive security level |
| One site's cookies must always be allowed or blocked | Privacy > Sites | Per-site rules override the general cookie level |
| A secure connection fails with a TLS or protocol error | Advanced > Security section, TLS check boxes | Confirms the protocol the server needs is enabled |
| Nothing else works and settings are a mess | Advanced > Reset | Returns every Internet Properties setting to the Windows default |
Delete browsing history and temporary Internet files
This clears the cache used by the legacy engine, including pages opened in Internet Explorer mode and apps that embed it. It does not clear Microsoft Edge's normal browsing data, which lives in Edge's own settings.
- Close the app or browser tab that is misbehaving.
- Open
inetcpl.cpland stay on the General tab. - Under Browsing history, select Delete….
- Tick Temporary Internet Files, Cookies and History, then select Delete.
- To stop stale copies coming back, select Settings under Browsing history and choose the option to check for newer versions every time you visit the webpage.
- Select OK to close the windows and reopen the app.
Configure proxy settings on the Connections tab
Only change these if your organisation gave you proxy details, or if you are removing a proxy you no longer use. Windows 11 also has proxy controls in Settings > Network & internet > Proxy, which is the simpler place for everyday changes.
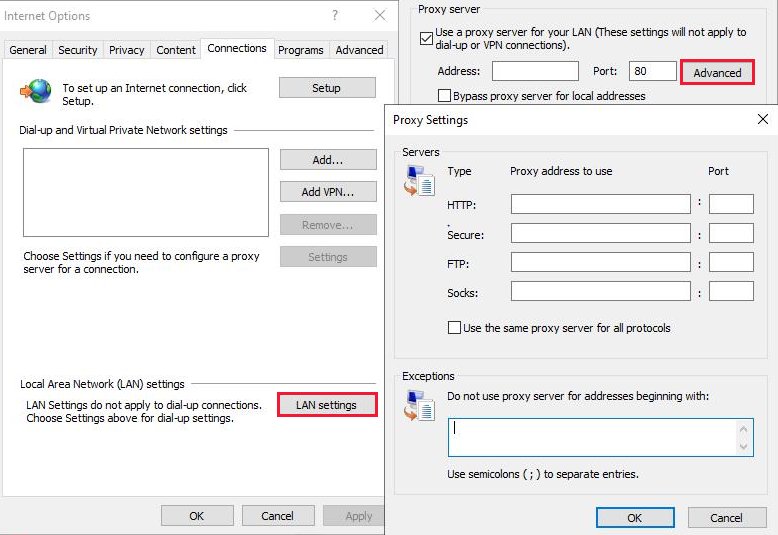
- Open
control inetcpl.cpl,,4to land on the Connections tab. - Select the button for Local Area Network (LAN) Settings.
- For automatic setup, tick the automatic detection option, or tick the setup script option and enter the script address your IT department gave you.
- For a manual proxy, tick the proxy server check box and enter the proxy address and port.
- Tick Bypass proxy server for local addresses so intranet sites skip the proxy, unless your organisation says otherwise.
- To exclude more sites, open the Proxy Settings dialog and enter them under Exceptions in Do not use proxy server for addresses beginning with, separated by semicolons.
- Select OK twice, then open a website to test.
A VPN connection keeps its own proxy settings. On Windows 11 set them in Settings > Network & internet > VPN, select the VPN, then Advanced options > Proxy settings for this VPN connection.
Copy the Internet Properties proxy to WinHTTP services
Background services such as Windows Update use WinHTTP, which keeps a separate proxy setting. Run this from an elevated Command Prompt after the proxy works in Internet Properties.
netsh winhttp import proxy source=ieImports the proxy configured in Internet Properties into the WinHTTP configuration. netsh winhttp show proxy displays the result, and netsh winhttp reset proxy returns WinHTTP to a direct connection.
You should see: netsh winhttp show proxy lists the same proxy server and bypass list you set on the Connections tab.
Manage trusted, restricted, and intranet sites
Windows sorts every site into a zone. Sites you do not list fall into the Internet zone. Add only addresses you control or your organisation names, because a trusted zone gets fewer restrictions.
- Open
control inetcpl.cpl,,1to land on the Security tab. - Select Local intranet, Trusted sites or Restricted sites.
- Select Sites. For Local intranet, select Advanced in the next dialog.
- Type the address in Add this Web site to the zone, for example
*.contoso.com, or an IP range such as157.54.100-200.. - Select Add, then Close or OK.
- Select OK to close Internet Properties and reload the site.
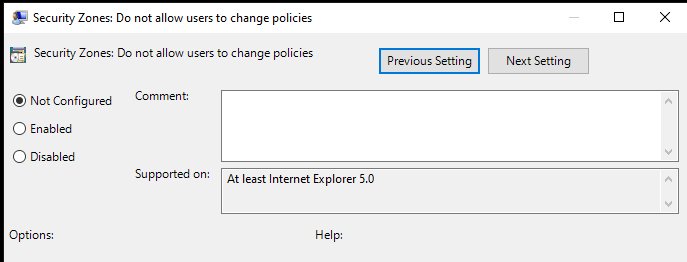
If the Security tab says Some settings are managed by your system administrator, Group Policy sets the zones and your changes are not used. Ask your IT team to add the site instead.
Reset Internet Explorer and related settings
A reset returns every Internet Properties setting to the Windows default. It can delete temporary files, cookies, browsing history and saved online passwords, but it does not delete favourites.
- Close all open programs, including every browser.
- Open
control inetcpl.cpl,,6to land on the Advanced tab. - Under Reset Internet Explorer settings, select Reset.
- Select Reset again to confirm.
- Select OK when the settings are reset, then restart the program that had the problem.
Security, privacy, and compatibility settings to review
These settings change how much legacy pages are allowed to do. Review them when something breaks, and move them back if the change did not help.
| Setting | Where | What to check | Safe default |
|---|---|---|---|
| Zone security level | Security tab | Each zone uses one of four levels: Low, Medium Low, Medium, High | Leave Internet and Restricted sites at their defaults; add a site to a zone instead of lowering a level |
| Cookie level | Privacy tab | Ranges from Block All Cookies to Accept All Cookies, with High, Medium High, Medium and Low between | Use per-site Sites rules for the one site that needs an exception |
| Pop-up blocker and location requests | Privacy tab | Whether sites may open pop-ups or ask for your physical location | Pop-up blocker on |
| TLS protocols | Advanced tab, Security section | TLS 1.2 must be ticked for modern Microsoft 365 and cloud sign-ins | TLS 1.2 on; TLS 1.0 and 1.1 are deprecated in Windows |
| Enhanced Protected Mode | Advanced tab, Security section | When on, add-ons load only if they are compatible with it | Leave it on unless a vendor's line-of-business app documents otherwise |
| Internet Explorer mode compatibility | Security tab zones | Edge's IE mode applies these zone and Protected Mode settings to legacy sites | Change zones only for the legacy site that needs it |
How to check your Internet Properties changes took effect
- Reopen
inetcpl.cpl. The changed tab should show your new values; if they reverted, a policy is overriding them. - For WinHTTP, run
netsh winhttp show proxyand confirm it lists the proxy or says direct access, whichever you intended. - For a zone change, open the site again. It should sign you in or run without the earlier block.
- For deleted history, reopen the old web app. It should load current content and ask you to sign in again.
Using inetcpl.cpl for browser and network troubleshooting
Match the symptom, then work through its fix in order. Each one starts from inetcpl.cpl.
No websites load, or only some do, after a network or VPN change
A leftover or wrong proxy is set on the Connections tab.
- Open
control inetcpl.cpl,,4and select Local Area Network (LAN) Settings. - If you do not use a proxy, clear the proxy server check box and the setup script option.
- If your organisation uses one, confirm the address and port match what IT gave you.
- Select OK twice and test a website.
- If Windows Update or other services still fail, run
netsh winhttp show proxyfrom an elevated Command Prompt and fix the WinHTTP proxy the same way.
Sign-in loops, cookie errors or stale cached pages
Old cookies or cached files from the legacy engine are being reused.
- Close the affected app.
- On the General tab, select Delete… under Browsing history.
- Tick Temporary Internet Files, Cookies and History, then select Delete.
- On the Privacy tab, check that the site is not listed as always blocked under Sites.
- Reopen the app and sign in again.
An intranet site is treated as an Internet site, or asks for a password
The site's address is not in the Local intranet zone, often because it is reached by FQDN or IP address.
- Open
control inetcpl.cpl,,1and select Local intranet. - Select Sites, then Advanced.
- Add
*.yourdomain.comor the IP address range, then select Add. - Select OK three times and reopen the site.
A site is blocked or its scripts do not run
The site sits in Restricted sites, or its zone level blocks the content.
- Open the Security tab and select Restricted sites > Sites.
- If the site is listed, select it and remove it from the list.
- If it is a site you trust, add it to Trusted sites instead.
- Select OK and reload the page.
Certificate, TLS or secure channel errors, such as OneDrive error 0x8004de40
The TLS version the service requires is switched off in Internet Properties.
- Open
inetcpl.cpland select the Advanced tab. - Scroll to the Security section.
- Make sure the TLS 1.2 check box is ticked.
- Select Apply, then OK, and try the connection again.
- If errors continue, use Reset on the same tab, as described above.
inetcpl.cpl frequently asked questions
What is inetcpl.cpl?
inetcpl.cpl is the Windows Control Panel module for Internet Options. It opens the Internet Properties window, which holds proxy, security zone, cookie, TLS and reset settings. Microsoft lists it at C:\Windows\System32\inetcpl.cpl with the canonical name Microsoft.InternetOptions.
How do I open inetcpl.cpl?
Press Windows key + R, type inetcpl.cpl and press Enter. From Command Prompt, PowerShell or Windows Terminal, run control inetcpl.cpl. Add a tab number to jump to one tab: control inetcpl.cpl,,4 opens the Connections tab.
Is inetcpl.cpl still useful if I do not use Internet Explorer?
Yes. Internet Explorer mode in Microsoft Edge uses its security zones and Protected Mode settings, WinHTTP can import its proxy, and Microsoft's own fixes for OneDrive and Defender update errors start in it. It is still the place to clear the legacy cache and reset these settings.
Is inetcpl.cpl safe or a virus?
The genuine inetcpl.cpl is part of Windows and lives in C:\Windows\System32. Opening it changes nothing until you select Apply or OK. A file with the same name anywhere else deserves a scan with Windows Security.
How do I reset Internet Properties to default?
Close all programs, open inetcpl.cpl and select the Advanced tab. Under Reset Internet Explorer settings, select Reset, then Reset again, then OK. The reset can remove temporary files, cookies, history and saved online passwords, but it keeps favourites.
How do I turn off the proxy in Internet Properties?
Open control inetcpl.cpl,,4, select Local Area Network (LAN) Settings and clear the proxy server and setup script check boxes, then select OK twice. On Windows 11 you can also turn off Use a proxy server in Settings > Network & internet > Proxy.
Does deleting browsing history in inetcpl.cpl clear Microsoft Edge?
No. The Delete button on the General tab clears data kept by the legacy Internet Explorer engine, including Internet Explorer mode pages. Clear Edge's normal browsing data from Edge's own Settings and more menu.
How do I add a trusted site in Internet Properties?
Open inetcpl.cpl, select the Security tab, select Trusted sites, then Sites. Type the address in Add this Web site to the zone, select Add, then Close and OK. If the tab says settings are managed by your administrator, ask IT to add it.
inetcpl.cpl and Internet Properties: bottom line
Keep inetcpl.cpl for proxy, security zone, TLS and reset jobs, and use Windows Settings or Edge's own settings for everything else. Internet Explorer is retired, but Internet Explorer mode, WinHTTP and several Microsoft fixes still read the settings in this panel. inetcpl.cpl in the Run box opens it in one step, and the ,,N tab numbers take you straight to the tab you need.