To turn on the camera on Windows 11, open Start > Settings > Privacy & security > Camera, switch Camera access to On, then open the Camera app to see a live preview.
If the preview stays black, the camera is blocked somewhere else: a lens shutter, a disabled device under Bluetooth & devices > Cameras, a driver, or a browser permission. Each of those has its own section below, followed by a checklist and fixes grouped by symptom.
Start with the Fastest Check: Open the Camera App
Windows 11 has no single camera power button. The camera turns on by itself when an allowed app asks for it, so the quickest test is the built-in Camera app.
- Select Start, type Camera, and open the Camera app from the results.
- Wait a few seconds. A working camera shows a live picture of you, and the camera light turns on if your PC has one.
- If the screen stays black or shows an error, open Start > Settings > Privacy & security > Camera and turn Camera access to On.
- Reopen the Camera app. A live preview means the camera is on and every other app can now request it.
A picture here but not in Teams or a browser points to an app permission, not the hardware.
Which fix matches what you see?
Match your symptom to a row and jump to that section.
| What you see | Most likely cause | Go to |
|---|---|---|
| Camera app shows an error instead of a picture | Camera access is off in Windows | Turn On Camera Access in Windows 11 Settings |
| Picture is completely black but the app runs | Lens shutter closed or camera key switched off | Turn On the Camera Using a Keyboard Key or Physical Switch |
| Camera works in the Camera app but not in one browser site | Site permission is set to Block | Allow Camera Access in Your Web Browser |
| Camera works in the Camera app but not in Teams or Zoom | Desktop apps are blocked, or the app picked another camera | Check App-Specific Camera Permissions and Settings |
| Camera is missing from Bluetooth & devices > Cameras | Camera disabled, driver missing, or turned off in firmware | Enable the Camera in Device Manager |
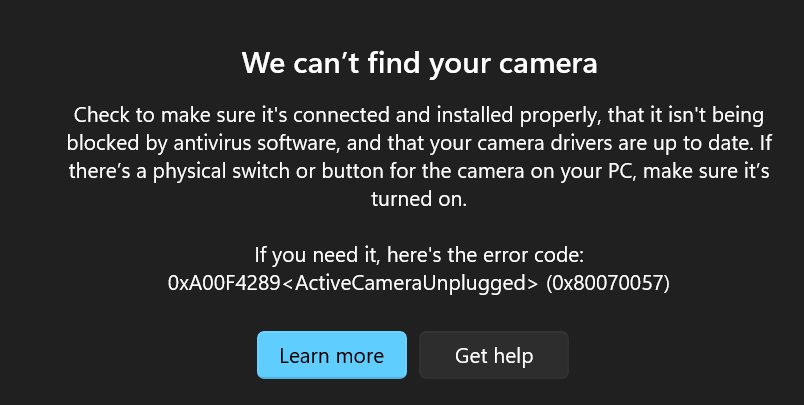
| Error 0xA00F4244 NoCamerasAreAttached | Windows cannot find a working camera | Common Camera Error Messages in Windows 11 |
| Plug-in webcam shows nothing | USB connection or webcam driver | Turn On an External USB Webcam |
Turn On Camera Access in Windows 11 Settings
Windows controls camera access at three levels: the whole device, Microsoft Store apps, and desktop apps. Browsers and video apps such as Microsoft Teams count as desktop apps, so the third switch matters for most calls.
- Select Start > Settings > Privacy & security > Camera.
- Turn Camera access to On. This enables the camera for the device and lets each user on the PC choose which apps can use it.
- Turn Let apps access your camera to On so Microsoft Store apps can ask for the camera.
- Under Let apps access your camera, turn on the switch next to each Store app you want to allow, such as Camera.
- Turn Let desktop apps access your camera to On. Desktop apps cannot be switched one by one, so this single switch covers browsers, Teams, Zoom and any app installed from the internet.
- Close Settings and reopen the app you want to use.
If Camera access is grayed out and cannot be changed, an administrator on the device has to change it. On a work or school PC, that means your IT department.
Turn On the Camera Using a Keyboard Key or Physical Switch
Many laptops block the lens in hardware, and no Windows setting overrides a closed shutter or hardware switch. The control differs by model: a sliding lens cover, a side switch, or a function key with a camera icon. Your PC maker's user guide shows which one yours has.
- Look at the lens above the screen. If a small cover sits over it, slide the cover sideways until the glass lens is visible.
- Check the top row of the keyboard for a key printed with a camera icon, often with a line through it. Press it once, or together with the Fn key if the icon is printed in a second color.
- Check the edges of the laptop for a slide switch marked with a camera icon, and move it to the open position.
- Reopen the Camera app to confirm a live picture.
Many external webcams have their own lens cover. Open it the same way before changing anything in Windows.
Select the Right Camera in the App You Are Using
A PC with a built-in camera and a plug-in webcam has two cameras, and each app remembers its own choice. A black picture often means the app picked the covered or unplugged one.
- Select Start > Settings > Bluetooth & devices > Cameras.
- Read the names listed under Connected cameras. Select one to see its live preview and confirm which physical camera it is.
- Open the app you use for calls and go to its settings page for audio and video devices.
- In the camera or video device list, select the name you confirmed in step 2.
- In a browser call, Chrome and Edge offer the same choice in the site's camera permission prompt and site settings.
- Start a test call or preview in the app to confirm the right camera is live.
Infrared cameras used for Windows Hello face sign-in are not listed under Connected cameras, so they will not appear as a choice for video calls.
Enable the Camera in Device Manager
A camera switched off in Settings or Device Manager disappears from apps completely. Windows 11 lists disabled cameras on the Cameras page, the simplest place to turn one back on. You need an administrator account.
- Select Start > Settings > Bluetooth & devices > Cameras.
- Look for a Disabled cameras section. If it does not exist, no camera is disabled in Settings.
- Select the camera under Disabled cameras, then select Enable.
- If the camera is not listed at all, select Start, search for Device Manager, and open it.
- Expand Cameras. Some webcams are listed under Imaging devices instead.
- If the camera shows a warning or disabled icon there, turn it on with the command in the next section, or reinstall its driver as described below.
- Restart the PC and check Bluetooth & devices > Cameras again.
A camera missing from both places, with no Cameras or Imaging devices entry, is either switched off in the PC's firmware or not connected. Jump to Check BIOS or UEFI Camera Settings.
Turn every camera back on from Command Prompt
PnPUtil is built into Windows and can enable devices by class. Filtering by class needs Windows 11, version 22H2 or later.
Select Start, search for cmd, right-click Command Prompt, and select Run as administrator before running it.
pnputil /enable-device /class CameraEnables every device in the Camera setup class, which holds the universal camera drivers used by built-in and USB webcams. Add /reboot to restart automatically if Windows needs a restart to finish.
You should see: PnPUtil reports each camera it enabled. Run pnputil /enum-devices /class Camera afterwards to list the cameras and their current status.
Update or Reinstall the Camera Driver
A missing, outdated or damaged driver stops Windows from talking to the camera. Windows Update is Microsoft's preferred route for driver updates, and Device Manager is the fallback.
- Select Start, search for Device Manager, and open it.
- Expand Cameras (or Imaging devices), right-click your camera, and select Update driver.
- Select Search automatically for drivers and follow the prompts.
- If the problem started after a recent driver update, right-click the camera, select Properties, open the Driver tab, and select Roll Back Driver. The button works only when an older driver version exists.
- To reinstall instead, right-click the camera, select Uninstall device, tick Attempt to remove the driver for this device, and select Uninstall.
- Select Action > Scan for hardware changes, or restart the PC, so Windows installs the driver again.
- If Windows finds no driver, get one only from your PC or webcam manufacturer's official support site.
Skip driver download sites and driver updater tools; Microsoft advises using only the manufacturer's official site.
Check Windows Update for Camera Fixes
Camera drivers and camera bug fixes arrive through Windows Update. A Windows 11, version 24H2 issue that froze apps using some integrated cameras was fixed this way, and optional driver updates must be installed by hand.
- Select Start > Settings > Windows Update.
- Select Check for updates and install everything offered.
- Select Advanced options and make sure Receive updates for other Microsoft products is On.
- Under Additional options, select Optional updates.
- If a camera or imaging driver is listed, select it and choose Download and install.
- Restart the PC, even if no update asked for a restart, then test the Camera app.
Allow Camera Access in Your Web Browser
Browsers ask for camera permission once per website, and a single Block answer sticks until you change it. The Windows switch Let desktop apps access your camera must also be on, because browsers are desktop apps.
On a work or school PC, an administrator can lock these browser settings.
| Browser | Allow a site when asked | Change a site you already blocked |
|---|---|---|
| Microsoft Edge | Go to the site and select Allow in the camera prompt. | Select Settings and more > Settings > Privacy, search, and services > Site Permissions > All sites, pick the site, and set Camera to Allow. |
| Google Chrome | Go to the site and choose Allow while visiting the site or Allow this time. | Select More > Settings > Privacy and security > Site settings > Camera, select the site under Not allowed to use your camera, and change it to Allow. |
| Any other browser | Accept the site's camera prompt. | Open the browser's site permission settings, find the camera entry for the site, and set it to allow. |
Reload the page after changing a permission. Most video sites only ask for the camera when the page first loads.
Check App-Specific Camera Permissions and Settings
Windows treats Store apps and desktop apps differently, which explains why one app can see the camera while another cannot. Find your app's type in the table, then check both the Windows switch and the app's own device setting.
| App type | Examples | Where Windows controls it | What else to check |
|---|---|---|---|
| Microsoft Store app | Camera, apps installed from Microsoft Store | Its own switch under Let apps access your camera | The app's camera selection, if it has one |
| Desktop app | Microsoft Teams, Zoom, Discord, OBS Studio, web browsers | One shared switch: Let desktop apps access your camera | The camera chosen in the app's audio and video settings |
| App that borrows the Camera app | Apps that open the Camera app to take a photo | The Camera app's own switch | The app does not appear in the list at all |
| Windows Hello face sign-in | Sign-in screen | Uses the camera even when Camera access is off | Turn Windows Hello off if you want it to stop using the camera |
Under Let desktop apps access your camera, Windows lists the desktop apps it has detected using the camera. Select one to see the exact file that accessed it.
Close Other Apps That Might Be Using the Camera
A camera already streaming to one app can refuse a second one, or the second app can end up with settings the first app changed. The Windows Cameras page shows a banner when another app is using the camera.
- Select Start > Settings > Privacy & security > Camera.
- Under Let desktop apps access your camera, read the list of desktop apps that have used the camera recently.
- Close every app on that list you are not using, including meeting apps minimized to the notification area.
- Open Bluetooth & devices > Cameras, select your camera, and check that no in-use banner appears above the preview.
- Open the app you want and start the camera again.
Check the Camera Privacy Indicator
Windows shows when the camera is live, which doubles as proof that your fix worked.
- Open the Camera app or start a video preview in your meeting app.
- If your PC has a camera light, confirm it turns on next to the lens.
- If your PC has no camera light, look for the Windows notification that appears when the camera turns on.
- Close the app and confirm the light goes off, or that Windows shows the camera-off notification.
- For a desktop app, open Settings > Privacy & security > Camera and check that it appears under Let desktop apps access your camera.
The camera message is a normal Windows notification. If you have turned off notifications in Windows, rely on the camera light or the recent-use list instead.
Turn On an External USB Webcam
A USB webcam turns on once Windows finishes installing its driver. After that, it appears in Settings next to any built-in camera.
- Open the webcam's lens cover, then plug it into a USB port directly on the PC rather than a hub.
- Wait for Windows to finish setting up the device.
- Select Start > Settings > Bluetooth & devices > Cameras and confirm the webcam appears under Connected cameras.
- Select the webcam to see a live preview.
- If it is mounted upside down or sideways, set Video rotation to Right 90°, Left 90° or 180°. This option exists only for external cameras.
- If the maker offers a companion app, open it from the button under Related settings on the same page.
- In your meeting app, pick the webcam as the camera.
The Cameras page sits under Bluetooth & devices, where you also turn Bluetooth on or off in Windows 11. It can also find and add ONVIF network cameras.
Where camera settings live in Windows 11
Two different Settings pages control the camera. Paste a shortcut into the Run box (Win + R) to jump straight to either one.
| Page | Path in Settings | Run shortcut | What it controls |
|---|---|---|---|
| Camera privacy | Privacy & security > Camera | ms-settings:privacy-webcam |
Which apps may use the camera |
| Cameras | Bluetooth & devices > Cameras | ms-settings:camera |
Enable, disable, preview and adjust each camera |
| Windows Update | Windows Update | ms-settings:windowsupdate |
Camera drivers and fixes |
On Windows 10, ms-settings:camera opens the Camera app instead, because the Cameras page arrived with Windows 11 build 22000.
Use Windows 11 Camera Settings
The Cameras page stores default image settings for each camera and each user account. Apps start the camera with these defaults, although an app can change them during a call.
Controls appear only when the camera supports them.
| Setting | What it does | Where to find it |
|---|---|---|
| Brightness, Contrast, Sharpness, Saturation | Sets the default image look for every app | Select the camera, then Basic settings |
| Video HDR | Keeps bright and dark areas detailed | Basic settings, on supported cameras |
| Background blur, Eye contact, Auto framing | AI video effects | Windows Studio Effects or Camera Effects |
| Video rotation | Rotates an external camera's image | External cameras only |
| Reset settings | Returns every setting to factory defaults | Bottom of the camera's page |
| Disable | Turns the camera off for every app | Camera's page, admin rights needed |
Run the Windows Camera Troubleshooter
The camera troubleshooter lives in the Get Help app and checks your system configuration for anything that stops the camera. Get Help troubleshooters replaced the older Microsoft Support and Recovery Assistant.
- Select Start > Settings > Bluetooth & devices > Cameras and select your camera.
- Select Troubleshoot. Windows opens the Get Help camera troubleshooter.
- If the camera is not listed, open the Get Help app from Start instead and type camera troubleshooter in the search bar.
- Follow the steps provided.
- Read the findings at the end and apply the suggested fix.
- Test the camera in the Camera app.
Repair or Reset the Windows Camera App
When only the Camera app fails and other apps show video, repair the app first and reset it only if repair does not help.
- Select Start > Settings > Apps > Installed apps.
- Find Camera in the list and select the More (…) icon next to it.
- Select Advanced options.
- Select Repair if it is available.
- Open the Camera app. If it still fails, return to the same page and select Reset.
Check Antivirus, Security, and Work or School Policies
Microsoft lists security software blocking the camera as a common cause of a dead camera. Keep the protection running and add the app you trust to its allowed list instead.
- Open your security app and look for a setting named webcam protection, camera protection or privacy protection.
- Check its log or blocked list for your meeting app or browser.
- Add that app to the allowed list, then restart the app.
- On a work or school PC, open Settings > Privacy & security > Camera. A grayed-out Camera access switch means the setting is managed by your organization.
- Ask your IT department to allow camera use. Chrome and Edge camera settings can also be locked by the same administrators.
Check BIOS or UEFI Camera Settings
Some PCs can switch the camera off in firmware, below Windows, where no Windows setting reaches. Check it when the camera is missing from both Settings and Device Manager.
Business Surface models have Front camera, Rear camera and IR camera switches on the Surface UEFI Devices page. Other makers name the menu differently; their support sites list it by model.
- Save your work and close open apps.
- Select Start > Power, hold Shift, and select Restart.
- Select Troubleshoot > Advanced options > UEFI Firmware settings, then Restart.
- On a Surface, open the Devices page. On other PCs, look through menus such as security, devices or I/O ports for a camera option.
- Set the camera to On or enabled.
- Save the change and exit. On a Surface, select Restart Now on the Exit page.
- After Windows starts, check Bluetooth & devices > Cameras.
A firmware password on a work PC means only IT can change it.
What to Do If the Camera Still Will Not Turn On
Work through the fix under the symptom that matches yours.
Why won't my camera turn on in Windows 11 in any app?
The camera is covered, disabled, or missing its driver.
- Open the lens shutter or press the camera key on the keyboard.
- Check Bluetooth & devices > Cameras for a Disabled cameras section and select Enable.
- Run the camera troubleshooter from the camera's page with Troubleshoot.
- Update the driver in Device Manager, then restart.
Cannot turn on the camera in Windows 11 because the switch is grayed out
An administrator or organization policy controls camera access.
- Sign in with an administrator account and try the Camera access switch again.
- On a work or school PC, ask IT to allow the camera.
Windows Hello couldn't turn on the camera
Windows Hello face sign-in uses the infrared camera, which is separate from the video camera.
- Restart the PC to reinitialize the camera.
- Update the camera drivers through Windows Update > Advanced options > Optional updates.
- Set up face recognition again in Settings > Accounts > Sign-in options.
Windows camera not turning on after an update
A new driver does not suit your camera.
- Open Device Manager, right-click the camera, and select Properties.
- On the Driver tab, select Roll Back Driver.
- Restart the PC and test the Camera app.
Common Camera Error Messages in Windows 11
Match the message to its row for the fix.
| Message | What it means | Fix |
|---|---|---|
| 0xA00F4244 NoCamerasAreAttached | Windows cannot find a working camera | Run the camera troubleshooter, update the driver through Windows Update, then check the shutter, firmware and Disabled cameras list |
| 0xA00F4275, camera roll missing | The Camera app cannot find the Camera Roll folder it saves to | Check Settings > System > Storage > Advanced storage settings > Where new content is saved, recreate the Camera Roll folder, and confirm you have Write permission on it |
| Camera access switch cannot be changed | An administrator manages the setting | Ask an administrator or IT to change it |
| Camera grayed out with a restart message on the Cameras page | The camera needs a restart to finish being disabled or enabled | Restart the PC |
| Site says camera permission denied | The browser or Windows blocked the site | Allow the site in browser settings and turn on Let desktop apps access your camera |
How to turn the camera off again
The privacy switch blocks apps; the Disable button turns the device off for every app and user.
- To block apps only, open Settings > Privacy & security > Camera and turn Camera access to Off.
- To disable the device, open Settings > Bluetooth & devices > Cameras and select the camera under Connected cameras.
- Select Disable, then confirm with Yes. Administrator rights are needed.
- Restart if the camera stays grayed out with a restart message.
- To turn it back on later, select it under Disabled cameras and choose Enable.
Quick Checklist to Turn On Your Camera in Windows 11
Verdict: work down the list in order and stop at the first item that brings back a picture, because the early checks are the quickest and cover the most common blocks.
| # | Check | Where |
|---|---|---|
| 1 | Lens shutter open, camera key or switch on | The laptop or webcam itself |
| 2 | Camera access, Let apps access your camera and Let desktop apps access your camera all on | Privacy & security > Camera |
| 3 | Camera not under Disabled cameras | Bluetooth & devices > Cameras |
| 4 | Right camera picked and site allowed | Meeting app settings or browser site settings |
| 5 | Latest updates and optional driver updates installed | Windows Update |
| 6 | Driver updated, rolled back or reinstalled | Device Manager > Cameras |
| 7 | Camera troubleshooter run | Camera's page > Troubleshoot |
| 8 | Camera enabled in firmware | UEFI Firmware settings |
Frequently Asked Questions
How do I turn on the camera on Windows 11?
Turn on Camera access, Let apps access your camera, and Let desktop apps access your camera under Settings > Privacy & security > Camera. Then open the Camera app; a live preview confirms the camera is on.
How do I turn on the camera on Windows 10?
Windows 10 uses the same privacy switches, which you can open by typing ms-settings:privacy-webcam in the Run box. Its desktop switch is named Allow desktop apps to access your camera. Windows 10 has no Cameras settings page, so use Device Manager for a disabled camera.
How do I turn on the camera on a Windows laptop?
Open the lens shutter or press the camera key first, because many laptops block the camera in hardware. Then turn on Camera access under Privacy & security > Camera and test the Camera app.
How do I get help in Windows 11 to turn on the camera?
Open the Get Help app, type camera troubleshooter in the search bar, and follow the steps. You can also select your camera under Settings > Bluetooth & devices > Cameras and choose Troubleshoot.
Why won't my camera turn on in Windows 11?
The usual causes are a closed shutter or camera key, Camera access turned off, a camera disabled on the Cameras page, a broken driver, or security software blocking it. Error 0xA00F4244 means Windows found no working camera.
How do I change which camera Windows uses?
Windows has no single default camera for every app. Each app picks its own, so choose the camera in the app's video settings or the browser's camera permission. Bluetooth & devices > Cameras shows each camera's name with a preview.
How do I use the Windows Camera app?
Select Start, type Camera, and open the app. It takes photos and videos and scans QR codes, barcodes, documents and whiteboards. Captures are saved to the Camera Roll folder by default.
How do I turn on the camera on my PC if it is a desktop?
A desktop PC needs an external webcam. Plug it into a USB port, open its lens cover, and confirm it appears under Settings > Bluetooth & devices > Cameras. Then select it in your app.
How do I turn on the Microsoft camera app if it will not open?
Go to Settings > Apps > Installed apps, select the More icon next to Camera, choose Advanced options, and select Repair. If that fails, select Reset on the same page.
How do I turn the camera off in Windows 11?
Turn Camera access to Off under Settings > Privacy & security > Camera to block every app. To switch the device off, select it under Bluetooth & devices > Cameras and choose Disable. Windows Hello face sign-in still works when only Camera access is off.