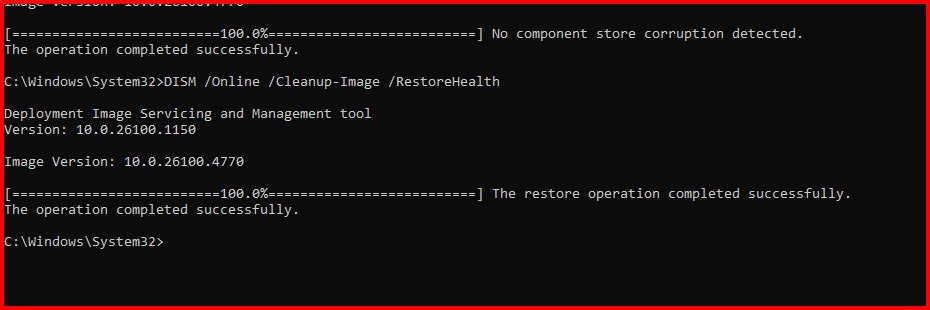
To repair a Windows image, open Command Prompt as administrator, run DISM.exe /Online /Cleanup-Image /RestoreHealth, wait for The restore operation completed successfully, then run sfc /scannow.
This guide covers what the command repairs, the CheckHealth and ScanHealth checks, repairing from a Windows ISO when Windows Update cannot help, reading the logs, the wider DISM cleanup commands, and what to do when the repair fails on Windows 11 and Windows 10.
The fastest way to repair a Windows image with DISM
This is Microsoft's own sequence for a PC that still starts. It needs an administrator account and, by default, an internet connection.
- Type cmd in the taskbar search box.
- Right-click Command Prompt and select Run as administrator, then select Yes at the prompt.
- Type
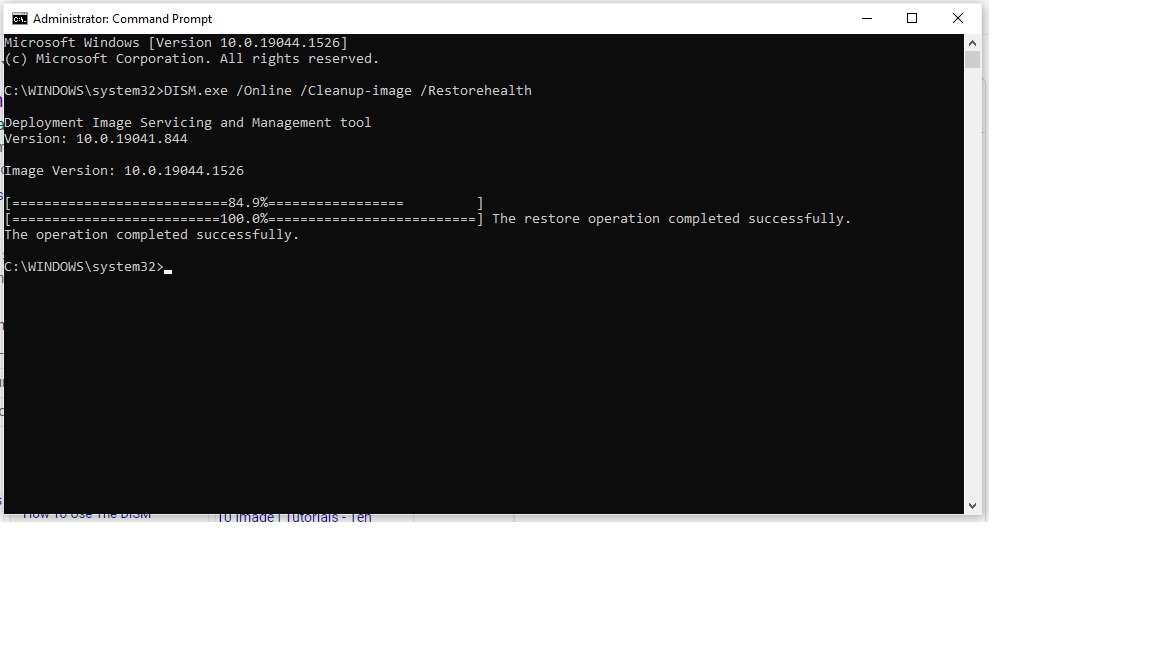
DISM.exe /Online /Cleanup-Image /RestoreHealthand press Enter. - Wait for The restore operation completed successfully. The scan takes several minutes.
- Type
sfc /scannowand press Enter to repair the system files from the now-healthy image. - Restart the PC when SFC reaches 100%.
What DISM /Online /Cleanup-Image /RestoreHealth Does
DISM (Deployment Image Servicing and Management) services Windows images. /Online points it at the running copy of Windows, and /Cleanup-Image selects its cleanup and recovery operations.
RestoreHealth repairs the component store, the store of known-good files that SFC copies from. That is why a broken store makes SFC fail and why DISM runs first.
| Part of Windows | What DISM checks | Where it lives |
|---|---|---|
| Servicing packages | Package files and their metadata | %SYSTEMROOT%\Servicing\Packages |
| Component manifests | Manifests that describe every component | %SYSTEMROOT%\WinSxS\Manifests |
| Component registry data | Component and schema registration | HKEY_LOCAL_MACHINE\Components and HKEY_LOCAL_MACHINE\Schema |
| Servicing registry data | Component Based Servicing state | HKEY_LOCAL_MACHINE\Software\Microsoft\Windows\CurrentVersion\Component Based Servicing |
| Repair files | Downloads good copies of damaged files | Windows Update by default, or the folder or .wim file named in /Source |
When DISM finds an incorrect manifest, cabinet file or registry entry, it replaces it with a corrected version.
When to Use DISM for Windows Image Repair
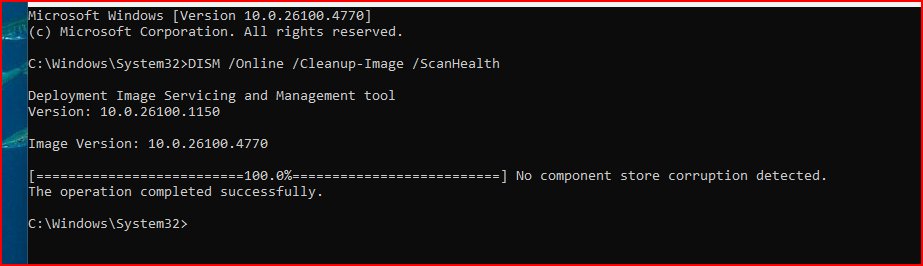
DISM has three health switches. They differ in speed and in whether they change anything, so match your situation to a row.
| Your situation | Run this | Why |
|---|---|---|
| You want a quick yes/no before repairing | DISM /Online /Cleanup-Image /CheckHealth |
Reports whether the image is already flagged as healthy, repairable or non-repairable. It changes nothing and finishes fast. |
| You suspect damage that nothing has flagged yet | DISM /Online /Cleanup-Image /ScanHealth |
Scans the whole component store for corruption. It takes several minutes and repairs nothing. |
| SFC reports files it cannot fix | DISM /Online /Cleanup-Image /RestoreHealth |
Rebuilds the store SFC repairs from, so a second SFC run can finish. |
| Windows Update fails with 0x80073712, 0x800f0831 or 0x800736CC | RestoreHealth, then Windows Update again | Microsoft lists these as component store corruption codes that DISM can fix. |
| Windows Update itself is broken or the PC is offline | RestoreHealth with /Source and /LimitAccess |
Takes repair files from an ISO or another PC instead of Windows Update. |
| Windows will not start | RestoreHealth with /Image from the recovery environment |
/Online only works on a running Windows installation. |
| CheckHealth reports the image is non-repairable | Reinstall Windows | Microsoft's guidance is to discard a non-repairable image rather than keep repairing it. |
What you need before you start
| Requirement | Detail |
|---|---|
| Administrator rights | DISM and SFC only run from an elevated Command Prompt, PowerShell or Terminal window. |
| A repair source | Windows Update by default. Without internet, a mounted image, a \sources\SxS folder or an install.wim file. |
| A matching source version | The source must be the same Windows version. If the PC is patched further than the source, the repair can fail. |
| Time | RestoreHealth and ScanHealth each take several minutes. Do not close the window mid-run. |
| Policy access on work PCs | Group Policy Specify settings for optional component installation and component repair can redirect or block the repair source. |
How to Run DISM RestoreHealth from Command Prompt or PowerShell
The command is identical in Command Prompt, PowerShell and Windows Terminal. DISM options are not case sensitive, so /restorehealth works as well as /RestoreHealth.
- Type cmd or PowerShell in the taskbar search box.
- Right-click the result, select Run as administrator and approve the prompt.
- Optional: run
DISM /Online /Cleanup-Image /CheckHealthfor a quick verdict on the image. - Optional: run
DISM /Online /Cleanup-Image /ScanHealthfor a full scan without repairs. - Run
DISM /Online /Cleanup-Image /RestoreHealthto scan and repair in one pass. - Leave the window open until DISM prints its final result line.
- Read the final line. The restore operation completed successfully means the store is repaired.
Type the switch as /Cleanup-Image with a hyphen, exactly as Microsoft's syntax shows it. The title of this guide writes it with a space only because that is how people search for it.
Using a Windows ISO or Install Media as a Repair Source
Use this when Windows Update cannot supply the files, or when RestoreHealth reports the source files could not be found. /LimitAccess stops DISM from falling back to Windows Update.
Microsoft recommends original release media patched to the latest cumulative update. A source older than the installed Windows may lack the files the PC needs.
- Download the ISO for your Windows version from Microsoft's official Download Windows 11 page, or plug in existing Windows install media.
- Mount the ISO from an elevated PowerShell window with
Mount-DiskImage -ImagePath "C:\Users\<you>\Downloads\Win11.iso", using your file's real path. - Note the drive letter the mounted ISO received in File Explorer, for example E:.
- List the editions inside the image with
DISM /Get-ImageInfo /ImageFile:E:\sources\install.wim. - Note the Index number whose Name matches the edition installed on the PC, such as Windows 11 Pro.
- Run
DISM /Online /Cleanup-Image /RestoreHealth /Source:Wim:E:\sources\install.wim:6 /LimitAccess, replacing E and 6 with your drive letter and index. - Wait for The restore operation completed successfully before closing the window.
The Wim: prefix and the :index suffix are required when the source is a .wim file. You can also point /Source at a mounted image's Windows folder, a \sources\SxS folder, or a shared \\<servername>\c$\windows folder on a PC running the same Windows version.
If you list several /Source locations, DISM copies from the first one that has the file and ignores the rest. Microsoft documents the Wim: source syntax for .wim files; if the sources folder holds no install.wim, use Windows Update or another PC as the source instead.
What the other DISM image commands do
RestoreHealth is one of several /Cleanup-Image operations. These are the ones worth knowing on a home or office PC; run each one from an elevated window.
| Command | What it does | Use it when |
|---|---|---|
DISM /Get-WimInfo /WimFile:E:\sources\install.wim |
Lists the images and editions inside a .wim file. /Get-ImageInfo /ImageFile: is the current name for the same job. |
You need the index number for a /Source path. |
DISM /Online /Cleanup-Image /AnalyzeComponentStore |
Reports the real size of the component store and whether cleanup is recommended. | WinSxS looks large and you want facts before cleaning. |
DISM /Online /Cleanup-Image /StartComponentCleanup |
Removes superseded component versions at once, with no 30-day grace period and no 1-hour timeout. | You want to reclaim disk space after updates. |
DISM /Online /Cleanup-Image /StartComponentCleanup /ResetBase |
Removes every superseded component version. Installed updates can no longer be uninstalled. | Only when you are sure you will not need to roll back an installed update. |
DISM /Image:D:\ /Cleanup-Image /RestoreHealth /Source:... |
Repairs an offline Windows installation whose root folder is D:\. |
Windows will not start and you are working from recovery tools. |
DISM /Cleanup-Mountpoints |
Deletes resources left by a corrupted mounted image. | A DISM mount operation was interrupted. |
Never delete the WinSxS folder by hand. Microsoft warns that doing so can leave the PC unable to boot or update.
How to check the repair worked
- Confirm RestoreHealth ended with The restore operation completed successfully.
- Run
DISM /Online /Cleanup-Image /CheckHealthand confirm it no longer reports a repairable or non-repairable image. - Run
sfc /scannowand confirm it finds no violations, or repairs everything it finds. - Open Settings > Windows Update and select Check for updates if a failed update started the problem.
- Confirm the update that failed before now installs.
How to Read DISM Results and Log Files
DISM writes two logs. %WINDIR%\Logs\DISM\dism.log records the DISM run itself, and %WINDIR%\Logs\CBS\CBS.log records what the servicing stack found and fixed.
Open either log in Notepad and scroll to the entries matching the time you ran the command. In CBS.log, look for the Summary block.
| What you see | What it means | What to do next |
|---|---|---|
| The restore operation completed successfully | The component store is repaired or was already healthy. | Run sfc /scannow. |
| CheckHealth: image is repairable | Corruption was flagged and can be fixed. | Run RestoreHealth. |
| CheckHealth: image is non-repairable | The store is beyond DISM repair. | Reinstall Windows, keeping your files. |
| Error 0x800f081f | CBS_E_SOURCE_MISSING: the repair source did not have the files. | Use a matching ISO with /Source and /LimitAccess. |
| Error 0x800f0906 | CBS_E_DOWNLOAD_FAILURE: DISM could not download from Windows Update. | Fix the connection or use a local source. |
| CBS.log: Total Detected Corruption higher than Total Repaired Corruption | Some damage remains after the run. | Repeat with a source that matches the installed build. |
| CBS.log: CSI Payload Corrupt or CBS MUM Missing lines | A named file or package is damaged or absent. | The version number in the line shows which update the file came from. |
What to Do If DISM RestoreHealth Fails
Check the most common causes first: a Command Prompt window without administrator rights, no internet connection, or a repair source from a different Windows version.
"The source files could not be found" or error 0x800f081f
Windows Update or your /Source location did not contain the files DISM needed.
- Get an ISO of the same Windows version as the PC, updated as recently as possible.
- Find the right index with
DISM /Get-ImageInfo /ImageFile:E:\sources\install.wim. - Run
DISM /Online /Cleanup-Image /RestoreHealth /Source:Wim:E:\sources\install.wim:<index> /LimitAccess. - If it still fails, use another PC running the same version:
/Source:\\<servername>\c$\windows /LimitAccess.
DISM cannot download files from Windows Update (0x800f0906)
Windows Update is broken, blocked or unreachable, so DISM has no repair source.
- Confirm the PC is online and the date and time are correct.
- Open Settings > System > Troubleshoot > Other troubleshooters.
- Find Windows Update and select Run, then follow the prompts.
- Restart, then run RestoreHealth again.
- If downloads still fail, switch to the ISO source with
/LimitAccess.
Work or school PC ignores Windows Update as a source
Group Policy sets a different repair source or blocks Windows Update for repairs.
- Open Edit Group Policy, then go to Computer Configuration > Administrative Templates > System.
- Open Specify settings for optional component installation and component repair to see the configured source.
- On a managed PC, ask IT for the approved repair source instead of changing the policy.
Windows will not start, so /Online cannot run
/Online only services a running Windows installation.
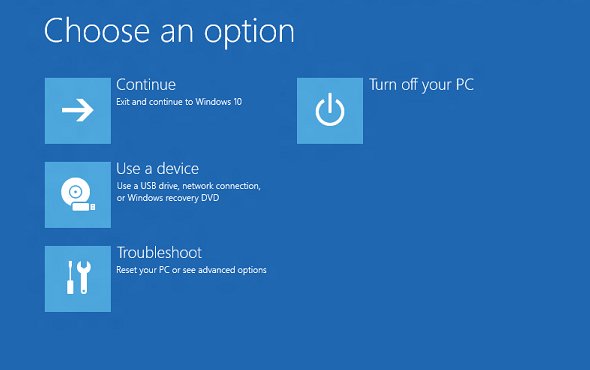
- Open Advanced startup: hold Shift while selecting Restart on the sign-in screen.
- Open the Command Prompt window from the recovery tools. Enter the BitLocker recovery key if asked.
- Type
dir D:\(thenC:\,E:\) to find the drive that contains the Windows folder. - Run
DISM /Image:D:\ /Cleanup-Image /RestoreHealth /Source:Wim:E:\sources\install.wim:<index>, using your Windows drive and media drive letters. - Restart and let Windows boot normally.
Repair keeps failing or the image is non-repairable
The component store is damaged beyond what DISM can fix.
- Back up your files.
- On Windows 11, version 22H2 or later, use the Reinstall Windows option in Microsoft's recovery options. It keeps files, apps and settings.
- If that is not available, use Reset this PC and choose to keep your personal files.
Running SFC After DISM to Finish System Repair
DISM fixes the store; SFC then fixes the protected files in use. Run SFC in the same elevated window right after DISM succeeds.
sfc /scannowScans every protected system file and replaces damaged ones with the copy from the component store that DISM just repaired.
You should see: Windows Resource Protection did not find any integrity violations, or found corrupt files and successfully repaired them.
For every SFC result message, safe-mode runs and reading its log, see the sfc /scannow guide.
Frequently Asked Questions
How do I repair a DISM image?
Open Command Prompt as administrator and run DISM /Online /Cleanup-Image /RestoreHealth. If it reports missing source files, repeat it with /Source:Wim:E:\sources\install.wim:<index> /LimitAccess pointing at a mounted Windows ISO of the same version. Finish with sfc /scannow.
How long should DISM /Online /Cleanup-Image /RestoreHealth take?
Microsoft describes RestoreHealth as taking several minutes. ScanHealth takes a similar time, while CheckHealth only reads an existing flag and finishes quickly. Leave the elevated window open until DISM prints its final result line, and do not close it mid-run.
Do I need an internet connection to run DISM RestoreHealth?
Only for the default source. DISM downloads good files from Windows Update. Without internet, add /Source pointing at a mounted ISO's install.wim, a mounted image or a shared Windows folder, and add /LimitAccess so DISM does not try Windows Update.
Should I run SFC or DISM first?
Run DISM first. Microsoft's own procedure puts DISM.exe /Online /Cleanup-Image /RestoreHealth before sfc /scannow, because SFC replaces damaged system files with copies from the component store. If the store is damaged, SFC has nothing good to copy.
What does "The restore operation completed successfully" mean?
It means DISM finished and the component store is healthy, either repaired or clean from the start. It does not mean every system file in use is fixed. Run sfc /scannow next to repair those files from the restored store.
What should I do if DISM fails with source files could not be found?
Give DISM a local source. Mount a Windows ISO of the same version, find the edition index with DISM /Get-ImageInfo, then run RestoreHealth with /Source:Wim:<drive>:\sources\install.wim:<index> /LimitAccess. A source older than the installed updates can still fail.
Can DISM repair an offline Windows image?
Yes. Replace /Online with /Image: followed by the root folder of the offline Windows installation, for example DISM /Image:D:\ /Cleanup-Image /RestoreHealth /Source:Wim:E:\sources\install.wim:1. This works from recovery tools when Windows will not start.
Does the DISM image repair command work in PowerShell?
Yes. DISM /Online /Cleanup-Image /RestoreHealth runs the same way in Command Prompt, PowerShell and Windows Terminal. Open the window with Run as administrator first, because DISM servicing commands need an elevated session.
Bottom Line
Run DISM /Online /Cleanup-Image /RestoreHealth first, then sfc /scannow, and switch to an ISO source with /LimitAccess only when Windows Update cannot supply the files. SFC can only repair from a healthy component store, and a repair source that matches the installed Windows version is what decides whether DISM succeeds.

![What Is Microsoft OneDrive And Do I Need It [Answered]](https://techdows.com/wp-content/uploads/2026/09/Outlookcom-storage-settings-page-showing-shared-Microsoft-account-usage.jpg)