To enable UPnP, turn on the UPnP setting in your router's admin page or app, then set your Windows network to Private and turn on Network discovery so the PC can find UPnP devices on the local network.
This guide covers the router switch on NETGEAR and Google Nest Wifi, the Windows 11 and Windows 10 settings, the services behind discovery, the security trade-off router makers and Microsoft describe, and fixes for strict NAT and missing devices.
How to enable UPnP on your router and Windows PC
UPnP has two halves. The router half opens ports automatically for games, consoles and chat apps. The Windows half lets your PC discover and be discovered by other devices on the home network.
- Open your router's admin page in a browser, or its mobile app, and sign in with the router's admin account.
- Find the UPnP setting, which is usually under an advanced or network settings menu, and turn it on.
- Save or apply the change.
- On the Windows 11 PC, open Settings > Network & internet, select Wi-Fi or Ethernet, select your network and choose Private network under Network profile type.
- Go back to Network & internet, select Advanced network settings > Advanced sharing settings, and turn on Network discovery under Private networks.
- Restart the game, console or app that needed UPnP so it requests its ports again.
If you only need open ports for a game or console, the router step alone is enough. If you only need to see other PCs, printers or media devices on your network, the Windows steps alone are enough.
What UPnP does
Universal Plug and Play is a set of protocols that lets devices on the same network find each other and, on a router, ask for ports to be opened to the internet without manual setup. Google describes it as letting devices "automatically discover and communicate with each other" and "create more direct channels of communication with the internet".
| Part of UPnP | What it does | Where you control it |
|---|---|---|
| Device discovery (SSDP) | Devices announce themselves and search for others on the local network over UDP port 1900 | Windows network discovery and the SSDP Discovery service |
| Device hosting | Lets a PC host UPnP devices that other computers can find and control, using TCP port 2869 | The UPnP Device Host service in Windows |
| Automatic port forwarding (IGD) | A game, console or app asks the router to open a port to the internet, then the router forwards traffic to it | The UPnP switch on the router |
| Port mapping table | Lists which device opened which internal and external port | The router's UPnP page, for example NETGEAR's UPnP Portmap Table |
NETGEAR lists multiplayer gaming, peer-to-peer connections and real-time communication apps as the main reasons to enable router UPnP.
Do you need router UPnP or Windows network discovery?
The two settings solve different problems. Match your goal to a row before you change anything.
| Your goal | Turn on | Why |
|---|---|---|
| Fix strict or moderate NAT on an Xbox or PC game | Router UPnP | The game needs the router to open ports automatically |
| Host a multiplayer game or use peer-to-peer apps | Router UPnP, or manual port forwarding | Inbound connections need a forwarded port |
| See other PCs, printers or media servers in File Explorer | Windows network discovery on a Private network | Discovery is a local network feature, not a router feature |
| Stream to a smart TV or media renderer on the same network | Windows network discovery and the discovery services | The PC must find the device through SSDP |
| Keep full control of open ports | Manual port forwarding, with router UPnP off | NETGEAR and Google both recommend manual rules for control |
Enable UPnP on the router
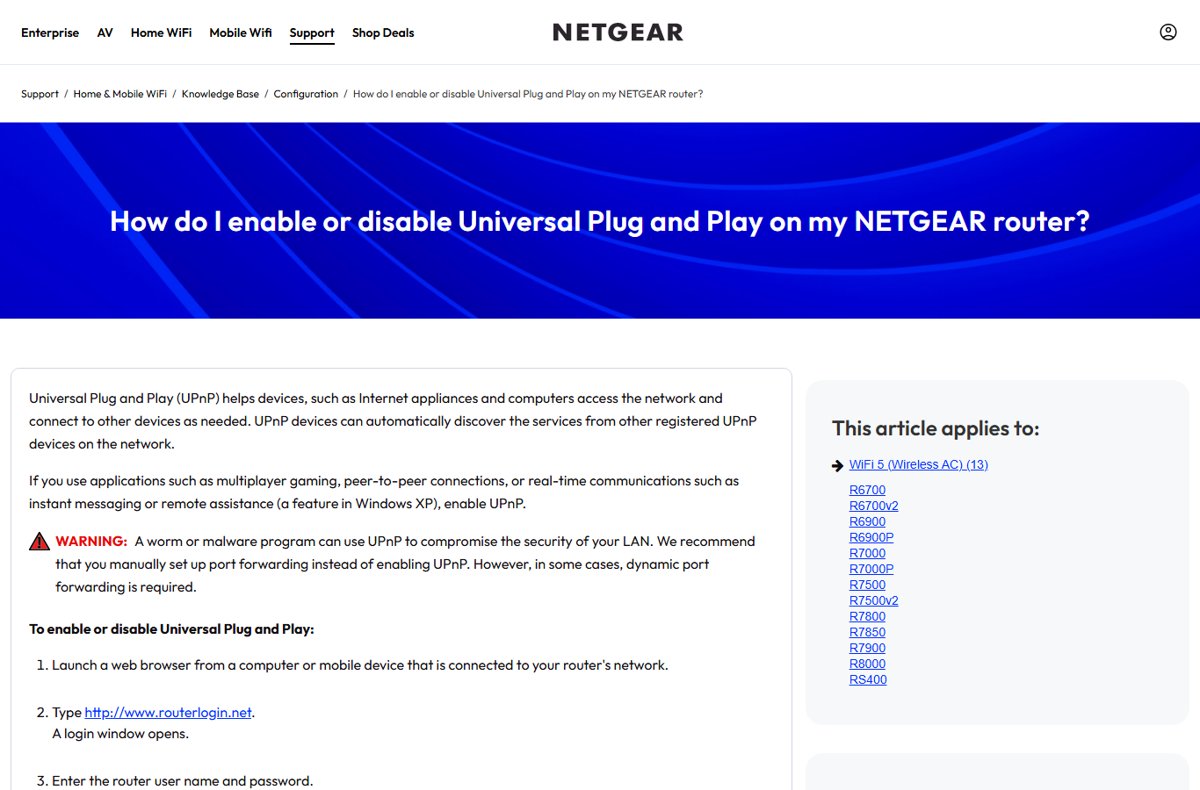
NETGEAR and Google Nest Wifi routers ship with UPnP already on, so check the current state first. These steps use a NETGEAR router's web interface; other brands use similar menus with different names.
- Connect a computer or phone to the router's network.
- Open a browser and go to http://www.routerlogin.net (NETGEAR), or the admin address printed on your router's label.
- Sign in with the router's admin user name and password.
- Select ADVANCED > Advanced Setup > UPnP.
- Select the Turn UPnP On check box.
- Leave Advertisement Period at 30 minutes and Advertisement Time To Live at 4 hops unless you have a reason to change them.
- Click Apply.
NETGEAR notes that when Turn UPnP On is cleared, the router does not allow any device to automatically control router resources such as port forwarding.
UPnP router settings for NETGEAR and Google Nest Wifi
The setting name and location differ by brand. These paths come from each maker's own support pages.
| Router | Where UPnP lives | Default | Extra options |
|---|---|---|---|
| NETGEAR (web interface, e.g. R7000, R7800, RS400) | ADVANCED > Advanced Setup > UPnP > Turn UPnP On | On | Advertisement period (1-1,440 minutes), time to live (1-255 hops), UPnP Portmap Table |
| Google Nest Wifi and Google Wifi | Google Home app > Wifi > Settings > Advanced Networking > UPnP | On | Manual rules under Port management in the same menu |
| Other brands | Check the router maker's support site for the UPnP or NAT forwarding page | Varies | Some apps hide UPnP and only show it in the web interface |
Enable network discovery in Windows 11
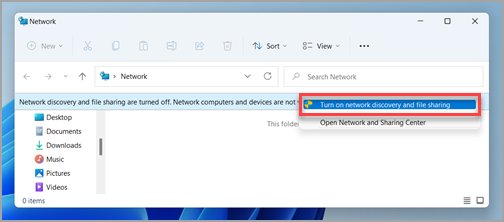
Network discovery only works on a Private network profile. Windows 11 sets new networks to Public by default, which hides the PC from other devices.
- Select Start > Settings > Network & internet.
- Select Wi-Fi or Ethernet, then select the network you are connected to.
- Under Network profile type, select Private network.
- Go back to Network & internet and select Advanced network settings.
- Select Advanced sharing settings.
- Expand Private networks and switch Network discovery to On.
- Switch File and printer sharing to On if you also want to share folders or printers.
- Approve the User Account Control prompt with an administrator account if it appears.
Microsoft says Private should be used only on a network where you know and trust the people and devices, such as your home network.
Enable network discovery in Windows 10
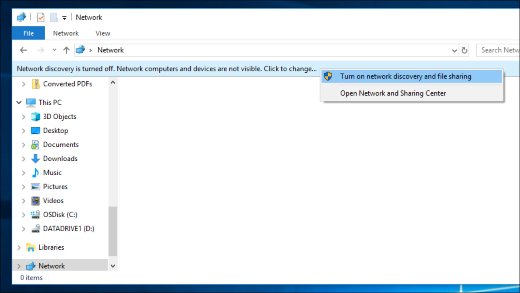
Windows 10 keeps the discovery switch in the classic Network and Sharing Center.
- Select Start > Settings > Network & Internet.
- On the Status page, select Properties under your Wi-Fi or Ethernet connection, then select Private under Network profile.
- Go back to Status and, under Advanced network settings, select Network and Sharing Center.
- Select Change advanced sharing settings in the left pane.
- Expand the Private section.
- Select Turn on network discovery.
- Select Turn on file and printer sharing if you need it.
- Select Save changes and approve the User Account Control prompt.
Start the Windows discovery services
Network discovery depends on four services. If they are stopped, the discovery switch can turn itself off again or other devices never appear.
- Press Windows logo key + R.
- Type
services.mscand select OK. - Right-click Function Discovery Provider Host and select Properties.
- Set Startup type to Automatic, select Start if the service is not running, then select OK.
- Repeat for Function Discovery Resource Publication, SSDP Discovery and UPnP Device Host.
- Confirm that DNS Client shows as running.
- Turn network discovery on again in Advanced sharing settings.
Microsoft describes SSDP Discovery as the service that discovers networked devices such as UPnP devices; without it, the computer cannot discover SSDP-based devices.
Security considerations before enabling router UPnP
Router UPnP lets any program on your network open ports to the internet without asking you. Router makers and Microsoft describe the same trade-off, and the official notes are summarised below.
If nothing on your network needs inbound ports, the safer choice is to disable UPnP on your router and forward ports by hand.
| Source | Official security note | What to do about it |
|---|---|---|
| NETGEAR | A worm or malware program can use UPnP to compromise the security of your LAN; NETGEAR recommends manual port forwarding instead, though some cases need dynamic forwarding | Prefer manual port forwarding for one console or one game; use UPnP when manual rules do not work |
| Google Nest Wifi | You do not know which devices or apps asked for open ports; an open port is a new entry point into your network | Review open ports, or turn UPnP off and set port forwarding rules for total control |
| Microsoft (Security Bulletin MS07-019) | A critical remote code execution flaw in the Windows UPnP service was exploitable from the same subnet; workarounds were blocking UDP 1900 and TCP 2869 or disabling the service | Keep Windows updated and use the Private profile only on trusted networks |
| Microsoft (Windows Server service guidance) | SSDP Discovery and UPnP Device Host are marked OK to disable on Windows Server 2016 with Desktop Experience | Leave discovery off on servers and PCs that do not need it |
| Microsoft (network profiles) | Public is the recommended profile and hides your PC from other devices on the network | Use Private only at home or on a network you trust |
Keep the router firmware current, change the default admin password, and check the router's UPnP port table from time to time for mappings you do not recognise.
How to check that UPnP is working on Xbox and Windows
- On an Xbox, press the Xbox button, then select Profile & system > Settings > General > Network settings.
- Read NAT Type under Current Network Status; you want Open, with no Double NAT detected or UPnP not successful message.
- Select Test NAT type after any router change to refresh the result.
- On a NETGEAR router, open ADVANCED > Advanced Setup > UPnP and click Refresh on the UPnP Portmap Table to see the ports each device opened.
- On the Windows PC, open File Explorer and select Network; other PCs, printers and media devices should appear without a "Network discovery is turned off" banner.
Troubleshoot UPnP and discovery problems
A game or console still reports Strict or Restricted NAT
UPnP is off, the router firmware is old, or two routers are doing NAT (double NAT).
- Turn UPnP on in the router, apply, then run Test NAT type again on the Xbox.
- Check the router maker's site for a firmware update and install it from the router's own admin page.
- If the console shows Double NAT detected, two devices are routing; set one of them, usually your own router or the ISP modem-router, to bridge mode so only one device handles NAT.
- If NAT is still not Open, set up manual port forwarding for the console's ports.
- As a last resort, Xbox support lists enabling the router's perimeter network (DMZ) feature for a single console.
Other PCs do not appear in Windows
The network is set to Public, discovery is off, or the discovery services are stopped.
- Make sure every PC is connected to the same router.
- Set the network to Private on each PC.
- Turn on Network discovery and File and printer sharing under Private networks.
- Start Function Discovery Provider Host, Function Discovery Resource Publication, SSDP Discovery and UPnP Device Host and set them to Automatic.
- Install pending updates from Windows Update on every PC and restart them.
Network discovery turns itself back off
A dependency service is not running, or the firewall does not allow network discovery.
- Start DNS Client, Function Discovery Resource Publication, SSDP Discovery and UPnP Device Host.
- Open Control Panel > System and Security, open the firewall settings and select Allow an app or feature through Windows Firewall.
- Select Change settings, tick Network discovery, then select OK.
- If your network uses another firewall, allow network discovery there too.
- Turn network discovery on again in Advanced sharing settings.
UPnP is missing from the router app
Some router apps expose fewer options than the router's web interface, or the device is in bridge mode.
- On Google Nest Wifi, open the Google Home app and go to Wifi > Settings > Advanced Networking.
- On other brands, sign in to the router's web interface from a browser and look under the advanced or NAT settings.
- If the router is in bridge mode, change UPnP on the device that handles routing, usually the ISP modem-router.
- If the router has no UPnP option at all, use manual port forwarding instead.
Outdated Windows UPnP instructions to ignore
Many UPnP guides were written for Windows XP or early Windows 10 builds. These are the instructions that no longer match current Windows.
| Outdated instruction | Why it no longer applies | Do this instead |
|---|---|---|
| Install a UPnP component from Add or Remove Windows Components | Windows 10 and 11 include the SSDP Discovery and UPnP Device Host services already | Start the existing services in services.msc |
| Create or join a HomeGroup to share with UPnP devices | Microsoft removed HomeGroup in Windows 10 version 1803 | Use network discovery and file sharing on a Private network |
| Open Network and Sharing Center in Windows 11 | Windows 11 moved the switches into Settings | Use Settings > Network & internet > Advanced network settings > Advanced sharing settings |
| Turn on a single Enable UPnP switch in Windows | Windows has no such switch; router port forwarding is a router setting | Turn UPnP on in the router and network discovery in Windows |
| Disable the firewall so UPnP devices can connect | This exposes the PC to the whole network | Allow Network discovery through the firewall instead |
How to turn off UPnP on the router and in Windows
- On a NETGEAR router, go to ADVANCED > Advanced Setup > UPnP, clear Turn UPnP On and click Apply.
- On Google Nest Wifi, open the Google Home app, go to Wifi > Settings > Advanced Networking and turn UPnP off.
- Add manual port forwarding rules for any console or game that still needs inbound ports.
- In Windows 11, set the network profile back to Public network (Recommended), or turn Network discovery off under Private networks in Advanced sharing settings.
- In Windows 10, select Turn off network discovery in Change advanced sharing settings and select Save changes.
Enable UPnP FAQ
Should UPnP be enabled?
Enable router UPnP if you play online games, use a console, or run peer-to-peer and chat apps that need inbound connections. Leave it off if you can set manual port forwarding, because NETGEAR and Google both say manual rules give you more control over open ports.
Should I enable or disable UPnP?
Enable it when strict NAT or failed connections block a game or app and manual forwarding is impractical. Disable it when nothing on your network needs inbound ports, or when you want full control, since any program on the network can ask the router to open ports.
Do I need UPnP enabled?
Not always. Web browsing, streaming and most apps work without it. You need it, or manual port forwarding, when an Xbox, PC game or peer-to-peer app reports strict or moderate NAT, or cannot host and join sessions.
How do I enable UPnP on my PC or computer?
Windows has no single UPnP switch. Set your network to Private, then turn on Network discovery under Advanced sharing settings, and make sure SSDP Discovery and UPnP Device Host are running. For automatic port forwarding, turn UPnP on in the router.
Is there an Enable UPnP switch in Windows 11?
No. Windows 11 controls the discovery side through Network discovery in Settings > Network & internet > Advanced network settings > Advanced sharing settings. Automatic port forwarding is controlled by the UPnP setting on your router.
Does Windows network discovery enable UPnP?
It enables the local side: your PC can find and be found by UPnP devices through the SSDP Discovery and Function Discovery services. It does not change the router, so it cannot open ports to the internet on its own.
Do I need to set Windows to Private for UPnP port forwarding?
No. Router UPnP is a router setting and works whatever profile Windows uses. The Private profile matters for network discovery and file sharing, because Microsoft's Public profile hides your PC from other devices on the network.
How do I allow UPnP on my router?
Sign in to the router's admin page or app and turn on the UPnP setting. On NETGEAR routers it is ADVANCED > Advanced Setup > UPnP > Turn UPnP On. On Google Nest Wifi it is in the Google Home app under Wifi > Settings > Advanced Networking.
Is it safe to enable UPnP?
It carries a known risk. NETGEAR warns that a worm or malware can use UPnP to compromise your LAN, and Google notes you cannot see which device asked for an open port. Keep firmware updated and check the router's port mapping table.
Why is UPnP enabled but my game still has restricted NAT?
Common causes are double NAT from two routers, outdated router firmware, or several consoles competing for the same ports. Fix double NAT first, update the firmware, then use manual port forwarding if Test NAT type still does not show Open.
How do I use UPnP once it is on?
There is nothing to run. Games, consoles and apps that support UPnP request ports automatically when they start. Restart the game or console after turning UPnP on, then check the router's port table to confirm a mapping appeared.
The bottom line: should you enable UPnP?
Turn router UPnP on only when a game, console or app needs open ports and manual port forwarding is not practical, and turn on Windows network discovery only on a Private home network you trust. Router makers and Microsoft describe the same trade-off: UPnP removes manual setup, but any program on the network can open ports without asking, while manual rules keep you in control of every entry point.