To create a daily cash book format in Excel, type the headers Date, Voucher No., Particulars, Category, Receipt, Payment and Balance in row 1, enter your opening balance in row 2, and use =G2+E3-F3 in the Balance column so every row shows the cash you hold after that entry.
Below are four ways to build it: a plain worksheet layout, a dynamic Excel table with drop-down lists, a ready-made template, and a VBA macro that adds entries for you. The layout is your own design built from standard Excel features, so adjust the columns to match how your business records cash.
Method 1: Manual daily cash book table setup in Excel
This plain layout works in every desktop version of Excel and takes about five minutes. Each row is one cash movement, and the Balance column carries the running total down the sheet.
- Open a blank workbook and type these headers in A1 to G1: Date, Voucher No., Particulars, Category, Receipt, Payment, Balance.
- In row 2, press Ctrl + ; in A2 to insert today's date, type
Opening balancein C2, and type the cash you hold right now in G2. - Enter your first transaction in row 3: the date, a voucher or receipt number, a short description, a category, and the amount under Receipt (cash in) or Payment (cash out).
- Click G3 and type
=G2+E3-F3, then press Enter. This adds the money received and subtracts the money paid from the previous balance. - Select G3, then drag its fill handle down as many rows as you expect to use this month.
- Select A2, then go to View > Freeze Panes > Freeze Panes so the header row stays visible while you scroll.
- Select columns E to G, press Ctrl + 1 to open Format Cells, and choose the number format you use for money.
The balance in the last filled row of column G is your closing cash for the day. Start the next day by typing new entries in the next empty row, and the formula keeps the total running.
The weakness of this layout is that nothing stops a mistyped amount or a category spelt three different ways. Method 2 fixes both.
Which Excel cash book method should you use?
| Your situation | Use this method | Why |
|---|---|---|
| You need a working cash book today and record a few entries a day | Method 1: manual table setup | Seven steps, one formula, works in any Excel version |
| Several people enter cash, or you want category totals | Method 2: dynamic table with data validation | Drop-downs keep categories consistent, the table grows on its own and totals update |
| You would rather start from a designed layout | Method 3: Excel templates | File > New gives ready-made workbooks you can adapt, and you can save your own as a template |
| You add many entries a day and repeat the same clicks | Method 4: VBA macros | A macro adds a dated row with one shortcut, but the file must be saved as .xlsm |
Method 2: Creating a dynamic cash book with formulas and data validation
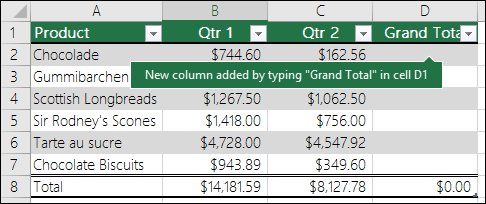
An Excel table turns the same columns into a cash book that extends itself. Formulas fill down automatically, drop-down lists control the categories, and a total row sums receipts and payments.
Start on a new workbook with two sheets: Cash Book for entries and Lists for your category names.
- On the Lists sheet, type
Categoryin A1 and your category names below it, such as Sales, Purchases, Wages, Rent and Bank deposit. Select any cell in the list and press Ctrl + T, then select OK. - On the Cash Book sheet, type the seven headers in A1 to G1 as in Method 1, select A1, press Ctrl + T, confirm that the table has headers, and select OK.
- With a cell in the table selected, open the Table Design tab, type
CashBookin the Table Name box, and press Enter. - Type
Opening balancein I1 and your starting cash in J1. - In the first Balance cell (G2) type
=$J$1+SUM(INDEX([Receipt],1):[@Receipt])-SUM(INDEX([Payment],1):[@Payment])and press Enter. Excel copies it down the whole column. - Select the cells under Category, go to Data > Data Validation, set Allow to List, click in Source, select the category names on the Lists sheet without the header, and select OK.
- Select the cells under Receipt and Payment, open Data > Data Validation, set Allow to Decimal, set Data to greater than or equal to, type
0as the minimum, and select OK. - On the Table Design tab, tick Total Row, then use the drop-down in the total cell under Receipt and Payment to pick Sum.
To add an entry, start typing in the row directly below the last table row. The table extends, the Balance formula fills in, and the drop-down appears in the Category cell.
For a daily summary, type a date in L1, then put =SUMIFS(CashBook[Receipt],CashBook[Date],L1) in L2 and =SUMIFS(CashBook[Payment],CashBook[Date],L1) in L3. Change the date in L1 to see any day's cash in and cash out.
Method 3: Using Excel templates or pre-designed cash book templates
Excel ships with a gallery of ready-made workbooks, and Microsoft hosts more at create.microsoft.com. Pick one with a ledger or expense layout and adapt its columns to the cash book format above.
- In Excel, select File > New.
- Browse the template gallery and select a ledger, budget or expense template close to the layout you want.
- Check the larger preview, then select Create to open a copy you can edit.
- Rename or add columns so the sheet has Date, Particulars, Receipt, Payment and Balance, and add the Balance formula from Method 1 or Method 2.
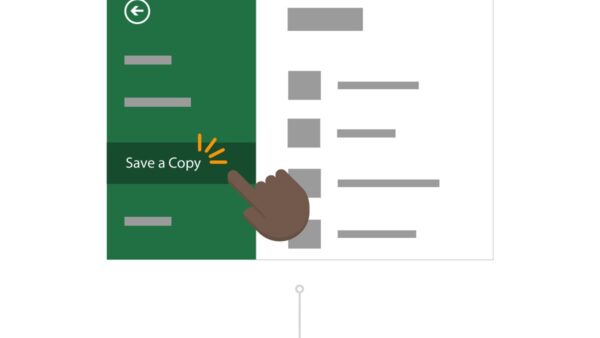
- To reuse your finished cash book, select File > Export > Change File Type, double-click Template, name it, and select Save.
- Next time, select File > New > Personal and double-click your template to start a fresh cash book with the same layout.
Saving your own layout as a template is the quickest way to start a new cash book each month or year without copying old entries by mistake.
Method 4: Automating a cash book with VBA macros
A macro repeats clicks for you, such as adding a new dated row to the CashBook table. Build Method 2 first, because the macro below writes into that table.
Save the workbook before you run a macro for the first time. Microsoft notes that macro actions cannot be undone.
- Select File > Options > Customize Ribbon, tick Developer under Main Tabs, and select OK.
- On the Developer tab, in the Code group, select Record Macro.
- Type
AddCashEntryin Macro name (no spaces), set a Shortcut key letter that Excel does not already use, keep Store macro in on This Workbook, and select OK. - Select Stop Recording straight away. This creates an empty macro you can fill with code.
- Select Developer > Macros, choose AddCashEntry, and select Edit to open the Visual Basic Editor.
- Replace the body of the macro with the code in the next section, then close the editor.
- Select File > Save As, set Save as type to Excel Macro-Enabled Workbook (*.xlsm), and select Save.
Press your shortcut key, or open Developer > Macros (Alt + F8) and run AddCashEntry, to add a dated row ready for the next entry.
Excel VBA macro code to add a daily cash book entry
This code uses Excel's documented ListObjects and ListRows.Add objects. It adds a row to the bottom of the CashBook table, fills in today's date, and selects the Particulars cell.
Sub AddCashEntry()
    Dim newRow As ListRow
    Set newRow = Worksheets("Cash Book").ListObjects("CashBook").ListRows.Add
    newRow.Range.Cells(1, 1).Value = Date
    newRow.Range.Cells(1, 3).Select
End Sub
ListRows.Add with no position adds a new bottom row to the table. Cells(1, 1) is the Date column and Cells(1, 3) is Particulars, so change those numbers if your columns sit in a different order. The sheet and table names must match yours exactly.
You should see: A new row appears under the last entry with today's date, the Balance formula already filled in, and the cursor waiting in Particulars.
If Excel shows a security warning when you reopen the file, enable macros only for a workbook you built yourself. Keep the default macro setting, Disable all macros with notification, rather than enabling all macros.
How to check the Excel cash book balance is correct
- Count the cash in your till or cash box at the end of the day.
- Compare it with the Balance in the last filled row. The two figures should match.
- Check the totals: opening balance plus total receipts minus total payments must equal the last Balance. In Method 2, type
=J1+CashBook[[#Totals],[Receipt]]-CashBook[[#Totals],[Payment]]in an empty cell to see that figure. - If they differ, filter the Date column with the header button to show only today, and check each amount against your receipts and vouchers.
- Click a few Balance cells and read the formula bar. Every one should follow the same pattern; a typed number in place of a formula breaks the running total below it.
Understanding the cash book: daily cash book format columns
A daily cash book is a dated list of every amount of cash received and paid, with the balance after each entry. In Excel it is one row per transaction, kept in date order.
| Column | What you enter | Example |
|---|---|---|
| Date | The day the cash moved; Ctrl + ; inserts today's date as a fixed value | 09/10/2026 |
| Voucher No. | The receipt, bill or voucher number, so each row traces back to paper | RV-014 |
| Particulars | Who paid you or whom you paid, and why | Cash sale, counter 1 |
| Category | A group for totals and reports, picked from a drop-down | Sales |
| Receipt | Cash coming in; leave blank for a payment | 250.00 |
| Payment | Cash going out; leave blank for a receipt | 40.00 |
| Balance | Formula only: previous balance + receipt – payment | 1,210.00 |
This is a single cash column layout. If your accountant asks for separate bank or discount columns, add them as extra Receipt and Payment pairs and extend the Balance formula to match their format.
Why use Excel for your daily cash book?
| Excel feature | What it does for a cash book |
|---|---|
| Running balance formula | Recalculates every balance when you correct an earlier entry |
| Excel tables | Grow with each new row and copy formulas down automatically |
| Data validation | Restricts categories to a list and blocks negative or text amounts |
| Filters and SUMIFS | Show one day, one category or one month, and total it |
| Templates | Start a fresh period with the same layout |
| Sheet protection | Locks the formula columns while leaving entry cells open |
A paper cash book needs the balance worked out by hand on every line. In Excel, one formula does it, and a correction on day 3 flows through to day 30.
Additional features to enhance your Excel cash book
| Feature you want | How to add it in Excel |
|---|---|
| Highlight a negative balance | Select the Balance cells, choose Home > Conditional Formatting > New Rule > Use a formula to determine which cells to format, enter =$G2<0, pick a red fill with Format, and select OK |
| Category or monthly summary | Select a cell in the table, choose Insert > PivotTable > New Worksheet > OK, then tick Category and Receipt or Payment in the PivotTable Fields pane |
| Protect the formulas | Select the entry columns A:F, press Ctrl + 1, clear Locked on the Protection tab, then choose Review > Protect Sheet and allow Insert rows |
| Daily totals for any date | Use SUMIFS on the Date column, as shown at the end of Method 2 |
| Faster date entry | Press Ctrl + ; for a fixed date; avoid =TODAY() in entry rows because it changes every day |
Protecting a sheet is not a security feature, and a forgotten sheet password cannot be recovered by Microsoft. Use it to stop accidental edits to the Balance column, not to hide data.
Best practices when creating a cash book in Excel
| Practice | Why it matters |
|---|---|
| Enter amounts only in Receipt or Payment, never both on one row | Keeps each row one movement, so the balance and your vouchers match line for line |
| Never type over a Balance cell | A typed number stops the running total from updating below it |
| Record entries the same day, in date order | The running balance only makes sense when rows follow the order the cash moved |
| Use fixed dates (Ctrl + ;), not TODAY() | TODAY() recalculates, so old entries would show the current date |
| Keep one opening balance cell | Every balance depends on it, so change it in one place only |
| Save a copy before running a macro | Macro actions cannot be undone with Ctrl + Z |
| Back up the workbook regularly | A cash book is a running record, and one damaged file loses every period in it |
Excel cash book formula, drop-down and macro problems
Data Validation is greyed out
The worksheet is protected or the workbook is shared.
- Select Review > Unprotect Sheet and enter the password if you set one.
- Add or change the drop-down under Data > Data Validation.
- Protect the sheet again from Review > Protect Sheet.
New categories do not show in the drop-down
The list source is a fixed range rather than an Excel table.
- Select a cell in your category list and press Ctrl + T to turn it into a table.
- Reselect the Category cells, open Data > Data Validation, and point Source at the table's data cells again.
- Add a category below the list and open a drop-down to confirm it appears.
The balance stops updating after a certain row
A Balance cell holds a typed number, or the Method 1 formula was not filled far enough down.
- Click the Balance cells near the break and read the formula bar.
- Copy a correct Balance cell from the row above and paste it over the typed value.
- Drag the fill handle further down so new rows have the formula.
The macro does not run when the workbook opens
Excel's default setting disables macros with a notification, or the file was saved as .xlsx.
- Check the file name ends in .xlsm; if not, save it again as Excel Macro-Enabled Workbook (*.xlsm) and rebuild the macro.
- Reopen the file and enable macros from the security warning for your own workbook.
- For a file you open daily, store it in a trusted location instead of changing the macro setting to enable all macros.
Daily cash book format in Excel FAQ
How to make cash book in Excel?
Type Date, Voucher No., Particulars, Category, Receipt, Payment and Balance as headers, enter the opening balance in G2, and put =G2+E3-F3 in G3. Fill the formula down, and each new row shows your updated cash balance.
How to create cash book in Excel with automatic balance?
Convert the range to an Excel table with Ctrl + T and use a calculated Balance column that adds receipts and subtracts payments from the opening balance. The table extends when you type below it, and the formula fills each new row automatically.
How to prepare a cash book?
List every cash receipt and payment in date order, one per row, with a reference number and a short description. Start from the opening cash balance and recalculate the balance after each entry, then compare the final figure with the cash you physically hold.
How to prepare cash book in accounts?
Record cash received and cash paid with dates, references and descriptions, keep the running balance, and reconcile it with counted cash. The exact columns your accounts need depend on your accounting system, so confirm the required format with your accountant before you start.
How to write cash book entries?
Write one transaction per row: the date, the voucher or receipt number, who paid or was paid and why, and the amount in either the Receipt or the Payment column, never both. The Balance column is a formula, so you never type it.
How to create a cash book for daily expenses?
Use the same layout and add a Category column with a drop-down of expense types such as fuel, supplies and wages. A PivotTable or SUMIFS formula then totals each expense category for any day or month.
How to do a cash book at the end of the day?
Count your cash, compare it with the last Balance in the sheet, and check that opening balance plus receipts minus payments equals that figure. If it does not match, filter the Date column to today and check each row against your vouchers.
Is a cash book a day book?
Not in this Excel layout. The sheet here records only cash received and paid, with a running balance, and the names of daily registers vary between accounting systems. Keep the sheet for cash only, and record non-cash transactions wherever your accountant tells you to.
Is there a daily cash book template for Excel?
Yes. Select File > New in Excel to browse built-in templates, or visit create.microsoft.com for more. Choose a ledger or expense layout, add Receipt, Payment and Balance columns if missing, and save it as your own template with File > Export > Change File Type > Template.
What is the purpose of a cash book?
A cash book shows every amount of cash that came in and went out, and how much cash you should hold after each entry. Comparing that balance with counted cash shows quickly when an entry is missing or wrong.
What does a sample cash book row look like in Excel?
A typical row reads: 09/10/2026, RV-014, Cash sale counter 1, Sales, 250.00 under Receipt, blank Payment, and a Balance formula that shows the previous balance plus 250.00. A payment row puts the amount under Payment instead.
Bottom line: best daily cash book format in Excel
Build Method 2, the Excel table with a calculated Balance column, a category drop-down and a total row, then save it as your own template. It takes about ten minutes more than the plain layout, but it stops the two errors that break cash books most often: inconsistent categories and a balance formula missing from new rows. Add the Method 4 macro only if you enter many rows a day.