To change a local account name in Windows 11, open Control Panel, select User Accounts, then select Change your account name and type the new name.
This guide also covers renaming any local account with Computer Management, Command Prompt and PowerShell, the naming rules Windows enforces, and fixes when the old name keeps showing.
Method 1: Change local account name via Control Panel
Control Panel is the route Microsoft gives for renaming a local account. It works on every Windows 11 edition, including Home.
You must be signed in to the account you want to rename, and that account needs administrator rights.
- Select Start, type Control Panel, then select Open.
- Select User Accounts.
- Select Change your account name.
- Type the new name in the box. Keep it to 20 characters or fewer.
- Confirm with the button under the box to save the new name.
- Sign out and sign back in so the Start menu and sign-in screen pick up the change.
This changes the name of the account you are signed in to. To rename a different local account, use Computer Management or PowerShell from an administrator account.
Methods to change local account name in Windows 11
Each tool reaches the same local account database. Pick the row that matches your situation.
| Your situation | Use this method | Why |
|---|---|---|
| You want to rename your own account with the mouse | Control Panel > User Accounts > Change your account name | Microsoft's documented route for local accounts, no commands needed |
| You need to rename another local account on the PC | Computer Management > Local Users and Groups > Users > Rename | Lists every local account, including the built-in Administrator |
| You prefer typing commands or are scripting several PCs | PowerShell Rename-LocalUser |
One line, and it reports an error if the name is taken |
| You are already in Command Prompt | net user to list accounts, then call Rename-LocalUser through powershell |
WMIC, the old Command Prompt rename tool, is removed from current Windows 11 |
| You only want a different full name, not a new user name | PowerShell Set-LocalUser -FullName or net user /fullname |
Changes the full name field and leaves the user name alone |
| You sign in with an email address | Edit the name on your Microsoft account online | That is a Microsoft account, not a local account |
Prerequisites and considerations for changing a local account name in Windows 11
Check these before you start. A name that breaks one of the rules is refused by every method.
| Requirement | Detail |
|---|---|
| Administrator rights | You must be a member of the Administrators group on the PC, or enter an administrator's credentials when prompted. |
| Length | A user name can contain up to 20 uppercase or lowercase characters. |
| Characters not allowed | " / \ [ ] : ; | = , + * ? < > @ |
| Periods and spaces | A name cannot consist only of periods (.) or spaces. |
| Unique name | The new name cannot match any other user name or group name on the same PC. |
| Account type | The account must be local. An account listed as MicrosoftAccount\[email protected] by Get-LocalUser is a Microsoft account and is renamed online. |
| 64-bit PowerShell | The LocalAccounts cmdlets are not available in 32-bit PowerShell on a 64-bit system, so open the standard Windows PowerShell or Terminal. |
Understanding local accounts in Windows 11
A local account exists only on one PC. The PC itself stores and checks the name and password, and the account has rights only on that device.
Microsoft and work or school accounts are managed by an online service, so their names change somewhere else.
| Account type | How to identify it | Where the name is changed |
|---|---|---|
| Local account | Signs in with a user name, not an email address | On the PC: Control Panel, Computer Management or PowerShell |
| Microsoft account | Signs in with an Outlook, Hotmail or other email address | Your Microsoft account profile online; changes can take up to 24 hours to appear everywhere |
| Work or school account | Signs in with an organization email address | Your organization's account settings; some organizations block name changes, so ask your IT admin |
Windows also creates built-in local accounts such as Administrator and Guest. The built-in Administrator account cannot be deleted, but it can be renamed or disabled.
Method 2: Change local account name via Settings app
Microsoft's instructions for renaming a local account send you to Control Panel, not to Settings. The Settings > Accounts pages handle other local account tasks.
Use this table to see what the Settings app can and cannot do for a local account.
| Task | Can Settings do it? | Where |
|---|---|---|
| Rename a local account | Not in Microsoft's documented steps | Use Control Panel > User Accounts > Change your account name |
| Add a local account | Yes | Settings > Accounts > Other users > Add account > Add a user without a Microsoft account |
| Change a local account to administrator | Yes | Settings > Accounts > Other users, open the account, then Change account type |
| Remove a local account | Yes | Settings > Accounts > Other users, open the account, then Remove |
| Change the local account password | Yes | Settings > Accounts > Sign-in options > Password > Change |
Method 3: Use Computer Management console
Computer Management stores every local account in Local Users and Groups > Users. Use it to rename an account other than the one you are signed in to.
- Select Start, type Computer Management, then open it.
- In the left pane, expand System Tools > Local Users and Groups.
- Select Users to list every local account on the PC.
- Right-click the account you want to rename and select Rename.
- Type the new user name and press Enter.
- Sign out of that account, or restart, so the new name shows everywhere.
The same Users folder has Set Password… on the right-click menu. Use it from another administrator account to reset a local account password.
Method 4: Change local account name using Command Prompt
Older guides use wmic useraccount ... rename here. From August 2026, Windows 11 versions 24H2 and 25H2 no longer include WMIC, and it cannot be added back as an optional feature.
The net user command lists accounts and sets a full name, but it has no rename switch. To rename from Command Prompt, call the PowerShell cmdlet.
- Select Start, type cmd, right-click Command Prompt and select Run as administrator.
- Type
net userand press Enter to list the user accounts on the PC. - Note the exact current name of the account you want to rename.
- Type
powershell -Command "Rename-LocalUser -Name 'OldName' -NewName 'NewName'"with your own names, then press Enter. - Run
net useragain and confirm the new name appears in the list. - Sign out of the renamed account, or restart, before you use it.
To change only the full name, run net user OldName /fullname:"New Full Name". The full name must be in quotation marks.
Method 5: Use Windows PowerShell to rename a local account
PowerShell renames a local account in one line. Open Windows PowerShell or Terminal as administrator first.
Run Get-LocalUser to list local accounts and copy the exact current name.
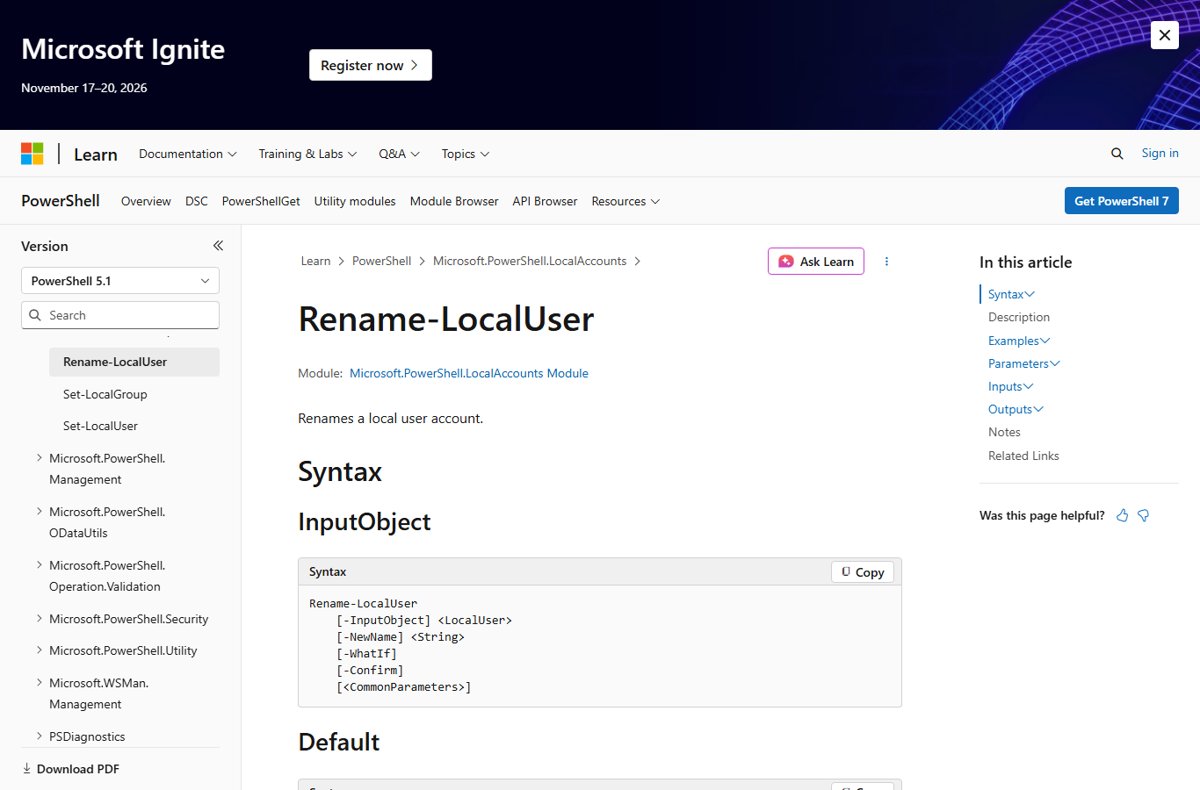
Rename-LocalUser -Name "OldName" -NewName "NewName"-Name is the account's current user name and -NewName is the name you want. Replace both values with your own. Add -WhatIf first to preview the change without making it.
You should see: The command returns to the prompt without output. Get-LocalUser then lists the account under the new name.
To change the full name instead, run Set-LocalUser -Name "NewName" -FullName "New Full Name". The full name is separate from the user name.
How to check the local account name changed in Windows 11
- Open Windows PowerShell and run
Get-LocalUser. - Find the new name in the Name column and check that Enabled shows True.
- Run
Get-LocalUser -Name "NewName" | Select-Object Name, FullNameto see the user name and full name together. - Sign out, then check the name on the sign-in screen.
- Sign in with the same password as before, because renaming does not change it.
Does renaming a local account change the user folder in Windows 11?
No. A renamed account keeps its security identifier (SID), so Windows treats it as the same account with the same profile.
Your user folder under C:\Users belongs to that profile and keeps its original name.
| What you might expect to change | What actually happens after a rename |
|---|---|
| Password | Stays the same |
| Group memberships, including Administrators | Stay the same |
| User profile and its folder | Stay the same |
| File permissions and user rights | Stay the same, because they are tied to the SID |
| Description and account information | Stay the same |
| Built-in Administrator account | Keeps its well-known SID, so renaming it does not hide it from an attacker |
Additional tips and troubleshooting when a local account name change fails
The old name still shows on the sign-in screen or Start menu
Some places cache the name until the session ends.
- Sign out of the account.
- Sign back in, or restart the PC if the old name remains.
- Run
Get-LocalUserto confirm the rename was saved.
Access denied, or the rename option is missing
The account you are using is not an administrator.
- Sign in with an administrator account.
- Run Command Prompt or PowerShell with Run as administrator.
- Repeat the rename.
The new name is rejected
The name breaks a naming rule or is already in use.
- Keep the name to 20 characters or fewer.
- Remove any of these characters: " / \ [ ] : ; | = , + * ? < > @
- Make sure the name is not only periods or spaces.
- Check with
net userthat no other account already uses the name.
'wmic' is not recognized in Command Prompt
WMIC is removed from current Windows 11 versions.
- Open Command Prompt as administrator.
- Run
powershell -Command "Rename-LocalUser -Name 'OldName' -NewName 'NewName'"instead.
Rename-LocalUser is not recognized in PowerShell
You opened 32-bit PowerShell on a 64-bit PC, where the LocalAccounts module is unavailable.
- Close the window.
- Select Start, type Windows PowerShell, and open the 64-bit Windows PowerShell or Terminal.
- Run the command again.
You sign in with an email address, so there is no local name to change
You are signed in with a Microsoft account, not a local account.
- Sign in to your Microsoft account online and edit your name there.
- Allow up to 24 hours for the new name to appear everywhere.
Change local account name FAQs
Can I change my local account name?
Yes. Any local account on Windows 11 or Windows 10 can be renamed by an administrator. Use Control Panel for your own account, or Computer Management and PowerShell for any account. The password, files and settings stay the same.
How do I change a local account name in Windows 10?
Open Control Panel, select User Accounts, then select Change your account name. The Computer Management and PowerShell methods also work the same way on Windows 10, since both versions use the same local account tools.
How do I change the local account name on an HP laptop?
Use the same Windows steps on any laptop or desktop, including HP. The account name belongs to Windows, not to the manufacturer. Open Control Panel > User Accounts > Change your account name, type the new name and sign out.
How do I change a local account name and password?
Change the name in Control Panel > User Accounts > Change your account name. Then change the password in Settings > Accounts > Sign-in options > Password > Change. Renaming alone never changes the password.
How do I change the local admin account name in Windows 11?
Rename your own administrator account from Control Panel. For the built-in Administrator account, open Computer Management > Local Users and Groups > Users, right-click Administrator and select Rename. A renamed Administrator keeps its well-known SID.
What is the easiest way to change a local user account name?
Control Panel is the easiest way. Select Start, type Control Panel, open User Accounts and select Change your account name. It needs no commands and works on Windows 11 Home.
Will changing my local account name delete my files?
No. A renamed account keeps its SID, so its profile, files, password, group memberships and permissions stay attached. The user folder under C:\Users keeps its original name.
Bottom line: which tool should you use to change a local account name?
Use Control Panel > User Accounts > Change your account name for your own account, and Rename-LocalUser in PowerShell for any other local account. Control Panel is the route Microsoft documents and needs no commands, while PowerShell renames any account in one line and works now that WMIC is gone.
A local account name is separate from the device name, so you may also want to rename your Windows 11 PC to match. If you are setting up a fresh machine, you can install Windows 11 26H2 with a local account and pick the right name from the start.



![Here’s list of all apps and games from Google’s Play Pass subscription [constantly updated]](https://techdows.com/wp-content/uploads/2026/10/Google-Play-Pass-sign-up-page-with-game-and-app-icons-above-600x338.jpg)