To see editing history in Word, open the Review tab, set the markup view to All Markup, and open the Reviewing Pane to list every tracked insertion, deletion and comment with its author.
Track Changes only records edits made while it is on, so this guide also covers Version History, Compare, comments, locking, printing and sharing a clean copy on Windows, Mac, the web and mobile.
How to see editing history with Track Changes in Word
These steps are for Word for Microsoft 365 on Windows. Edits made before Track Changes was switched on are not recorded as tracked changes.
- Open the document and select the Review tab.
- In the Tracking group, open the Markup drop-down and choose All Markup.
- Read the edits in the page: inserted text is underlined, deleted text has a line through it, and each reviewer gets a different color.
- Select Reviewing Pane and choose Reviewing Pane Vertical to list every change and comment with the reviewer's name next to the document.
- To start recording new edits, select Track Changes in the Tracking group and choose For Everyone or Just Mine.
Quick reference: best Word editing history method for each situation
| Your situation | Use this | Why |
|---|---|---|
| Track Changes was on while people edited | Review tab > Markup > All Markup | Shows every insertion, deletion and formatting change with its author |
| You want a list of all edits in one place | Review tab > Reviewing Pane | Lists each change and comment, with a count at the top |
| Nobody turned on Track Changes, file is in OneDrive or SharePoint | Version History | Opens earlier saved versions you can read or restore |
| You have two separate copies of the file | Review tab > Compare > Compare Documents | Builds a new document with revision marks for every difference |
| You need the discussion, not the text edits | Show Comments in List view | Shows active and resolved comment threads together |
| You only want one reviewer's edits | Show Markup > Specific People | Hides every other reviewer's changes |
What “editing history” means in Microsoft Word
Word has no single history log. Four separate features each record a different part of what happened to a document.
| Feature | What it records | What it cannot show |
|---|---|---|
| Track Changes | Each insertion, deletion, move and formatting change, with author and color | Edits made while it was off |
| Version History | Earlier saved copies of a file stored in OneDrive or SharePoint | Files saved only on a local drive |
| Compare Documents | Differences between two copies, shown as revision marks | Who made each change, if the copies had no tracking |
| Comments | Notes and replies attached to text, including resolved threads | Text edits themselves |
How to view tracked changes in Word
The Markup drop-down in the Tracking group decides how much of the editing history you see on the page.
| Markup option | What you see | Use it when |
|---|---|---|
| Simple Markup | A red line in the margin next to each changed line | You want to read the text with only a hint of where it changed |
| All Markup | Colored text and lines for each reviewer, plus comments | You want the full editing history in place |
| No Markup | The document as it would look with every change accepted | You want to read the edited result |
| Original | The document before any tracked change | You want to see the starting text |
To filter the view, select Show Markup and clear Insertions and Deletions or Formatting. To view changes by reviewer, select Show Markup > Specific People and clear every name except the reviewers you want. Under Show Markup > Balloons you can show revisions in balloons in the margin or inline in the text; balloons need Print Layout or Web Layout view.
How to use the Reviewing Pane in Word
The Reviewing Pane is the closest thing Word has to an edit log. Use it when a long document has changes scattered across many pages.
- Select the Review tab.
- Select the arrow next to Reviewing Pane.
- Choose Reviewing Pane Vertical to show the list beside the document, or Reviewing Pane Horizontal to show it below.
- Read the summary at the top, which shows the number of visible tracked changes and comments still in the document.
- Scroll the list to read each change and comment with the reviewer's name.
The pane also shows comment content that modern comment cards cannot display, such as old formatting, tables or equations from earlier Word versions.
How to accept or reject changes in Word
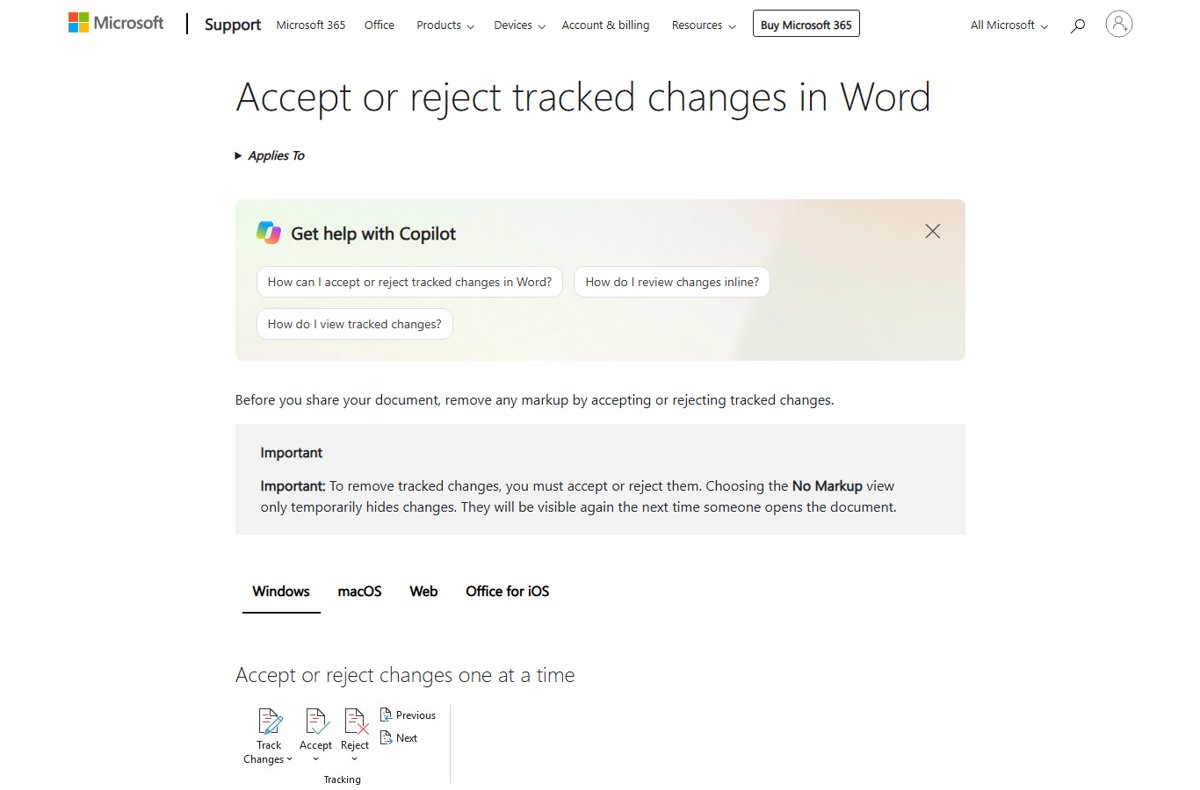
Accepting or rejecting is the only way to remove tracked changes. Switching to No Markup hides them only until the next person opens the file.
- Click at the beginning of the document.
- On the Review tab, go to the Tracking area.
- Select Accept or Reject for the first change; Word moves to the next change.
- Repeat until every change is handled, or select Next and Previous to review without deciding.
- To handle everything at once, open the Accept drop-down and choose Accept All Changes, or open the Reject drop-down and choose Reject All Changes.
How to see earlier versions with Version History in Word
Version History works even when nobody turned on Track Changes. The file must be stored in OneDrive or SharePoint in Microsoft 365.
| Word version | Where to find it | Can you restore? |
|---|---|---|
| Word for Microsoft 365 on Windows | Select the file name in the title bar > Version history | Yes, select Restore on the opened version |
| Word 2016 to 2021 on Windows | File > History (or File > Info if History is missing) | Open the older version in its own window |
| Word for Microsoft 365 for Mac | Select the document name in the title bar > Browse Version History | Open the older version in its own window |
| Older Word for Mac | File > Browse Version History | Open the older version in its own window |
| Word for the web | File > Version History | Yes, select Restore on the opened version |
Each version opens in a separate window, so you can read it beside the current file. Personal Microsoft accounts keep the last 25 versions; work or school libraries keep whatever number the SharePoint library is set to.
How to compare two Word documents to find edits
Compare is the fix when someone edited a copy with Track Changes off. Word builds a third document and leaves both originals untouched.
- Open one of the two versions in Word.
- On the Review tab, select Compare > Compare Documents.
- In the Original document list, select the older copy.
- In the Revised document list, browse to the edited copy and select OK.
- Read the new document, where revision marks show every difference the revised copy introduced.
To fold two reviewers' copies into one file instead, choose Compare > Combine Documents and pick the two copies the same way.
How to see comments and comment history in Word
Word for Microsoft 365 uses modern comments, which have two views. Contextual view shows active comments in the margin and hides resolved ones; List view shows active and resolved comments together.
- Select the Review tab.
- Select the drop-down arrow on Show Comments.
- Choose List to open the Comments pane with every active and resolved thread.
- Select a comment to highlight the text it belongs to and scroll to it.
- To reopen a resolved thread, reopen it in List view; it then shows again in Contextual view.
- To delete or resolve a thread, select More thread actions (…) on the comment.
Delete comments carefully. Resolving a thread keeps it in List view as part of the record, while deleting it takes it out of the conversation.
How to tell if Track Changes is on in Word
- Select the Review tab and look at Track Changes in the Tracking group; the button is highlighted when tracking is on.
- For a constant indicator, right-click the status bar at the bottom of the window and select Track Changes.
- Type a test word and check that it appears underlined in a reviewer color under All Markup.
- Select Undo to remove the test word, or reject the change.
How to lock Track Changes so others cannot turn it off
A tracking lock stops other reviewers from switching Track Changes off without the password. Keep the password somewhere safe.
- On Windows, select the Review tab.
- In the Tracking group, open the Track Changes drop-down and choose Lock Tracking.
- Enter and confirm a password when Word asks for one.
- On a Mac, select Review > Protect > Protect Document, enter and confirm a password, and select OK.
- To unlock on a Mac, clear Protect document for and enter the password.
How to print a Word document with editing history
Word prints what the current markup view shows, so set the view before you print.
- On the Review tab, set the Markup drop-down to All Markup.
- Select Show Markup and tick the items you want on paper, such as Comments or Insertions and Deletions.
- Select File > Print.
- Under Settings, select the arrow next to Print All Pages and make sure Print Markup is ticked.
- Select Print.
To print without the history, clear Print Markup in the same list, or choose No Markup on the Review tab before printing. The Advanced Track Changes Options dialog also has a Paper orientation in printing setting that can force landscape when printing with tracked changes.
How to save or share a clean copy of a Word document without editing history
Hidden markup travels with the file. Remove it before you send a document outside the review group.
- Select File > Save As and save a copy, because Document Inspector removals may not be undoable.
- In the copy, accept or reject every tracked change with Accept All Changes or Reject All Changes.
- Delete the comments you do not want to share.
- Select File > Info > Check for Issues > Inspect Document.
- Tick Comments, Revisions, Versions, and Annotations and select Inspect.
- Select Remove All next to any category that still has content, then select Reinspect to confirm it is clean.
- Save the copy and share that file.
How editing history works in Word on mobile
The Word apps for iPhone and iPad show the same tracked changes and comments as the desktop app. Version History and Compare are not part of these mobile controls.
| Task | Word on iPhone | Word on iPad |
|---|---|---|
| Turn tracking on or off | Open the ribbon, go to Home > Review, and toggle Track Changes | On Review, tap the Track changes and Markup options button > Track Changes > For Everyone or Just Mine |
| Choose what you see | Review > Display for Review: All Markup, No Markup or Original | Same button, then pick a markup option |
| Filter by type or reviewer | Show Markup: Ink, Insertions & Deletions, Formatting, or specific reviewers | Show Markup: Ink, Insertions & Deletions, Formatting, or specific reviewers |
| Accept or reject | Double-tap a change, then Accept or Reject on the Review tab | Double-tap a change, then use the Changes button on the Review tab |
| Read a comment | Tap the highlighted text to open the comment pane | Tap the highlighted text to open the comment pane |
In Word for the web, select Track Changes on the Review tab and choose For Everyone, Just Mine or Off, then use Markup view to switch between Simple Markup and All Markup.
Common Word Track Changes problems and fixes
Tracked changes come back after you chose No Markup
No Markup only hides changes; they stay in the file until accepted or rejected.
- On the Review tab, open the Accept drop-down.
- Choose Accept All Changes, or handle each change one at a time.
- Run File > Info > Check for Issues > Inspect Document to confirm nothing is left.
Version History is missing or greyed out
Version History only works for files stored in OneDrive or SharePoint in Microsoft 365.
- Check the file location in the title bar or File > Info.
- If the file is on a local drive, save a copy to OneDrive so future versions are kept.
- On Word 2016 to 2021, look for File > History; if it is absent, check File > Info.
Resolved comments are not visible
Contextual view hides resolved comments by design.
- On the Review tab, select the arrow on Show Comments.
- Choose List to show active and resolved threads.
Comments and balloons push the page off the screen
Revisions are shown in balloons in the margin.
- On the Review tab, select Show Markup in the Tracking area.
- Select Balloons and choose Show All Revisions Inline.
Reviewer colors change each time the file opens
With By author, Word picks each author's color itself, and colors differ between computers.
- On the Review tab, select the Tracking dialog launcher.
- Select Advanced Options.
- Set the Color boxes to a fixed color instead of By author if you want stable colors on your computer.
Old edits do not show up at all
Track Changes was off when those edits were made, so Word never recorded them.
- Open Version History and look for a version saved before the edits.
- If you have an older copy instead, use Compare > Compare Documents against the current file.
Best practices for tracking edits in Word
| Practice | Why it helps |
|---|---|
| Turn on Track Changes before you send the file for review | Edits made while it is off are never recorded |
| Use Lock Tracking for outside reviewers | Nobody can switch tracking off without the password |
| Store review files in OneDrive or SharePoint | Version History then keeps earlier saved copies |
| Resolve comments instead of deleting them | Resolved threads stay visible in List view |
| Keep Track formatting on in Advanced Track Changes Options | Bold, font and size changes stay in the history |
| Run Document Inspector on a copy before sending outside | Removes leftover revisions and comments without touching the original |
Word editing history FAQ
How do I see editing history in a Word document if Track Changes was off?
Use Version History if the file is stored in OneDrive or SharePoint, or compare an older copy with Compare Documents. Word does not record edits made while Track Changes is off, so tracked markup cannot show them.
How do I see editing history in Word Online?
In Word for the web, select File > Version History to open earlier versions, and select Restore to roll back. For tracked edits, set Markup view on the Review tab to All Markup.
Can I see who edited a Word document?
Yes, when Track Changes was on. Each reviewer's edits appear in a different color, and the Reviewing Pane lists every change with the reviewer's name. Show Markup > Specific People filters the view to chosen reviewers.
How do I see editing history in Excel?
Excel for Microsoft 365 uses the same Version History as Word for files in OneDrive or SharePoint. Select the file name in the title bar and choose Version history, then open any earlier version in a separate window.
How do I see editing history in PowerPoint?
PowerPoint files in OneDrive or SharePoint have the same Version history option as Word. PowerPoint has no Word-style Track Changes button, so you track changes in PowerPoint by comparing two copies of the presentation instead.
How do I see editing history in OneDrive or SharePoint?
Open the Word file from OneDrive or SharePoint and select the file name in the title bar, then Version history. Personal Microsoft accounts keep the last 25 versions; work or school libraries keep the number their SharePoint settings allow.
How do I see editing history in Google Docs?
Open the document and click the Last edit link at the top right. The right panel lists versions with who edited and what changed. Some Google Workspace plans also let you right-click selected text and choose Show editors.
Does No Markup remove tracked changes?
No. No Markup only hides tracked changes on your screen, and they return the next time someone opens the file. Accept or reject every change to remove it, then run Document Inspector to confirm.
How do I see resolved comments in Word?
On the Review tab, select the arrow on Show Comments and choose List. List view shows active and resolved threads together, while the default Contextual view hides resolved comments.