Press Ctrl + Alt + T on a signed-in Chromebook to open Crosh, the built-in ChromeOS shell.
This guide covers opening Crosh on every kind of Chromebook, the basic commands to start with, reaching the full shell through developer mode, closing a session and fixing Crosh when it will not open.
Using the keyboard shortcut
Crosh has no icon in the app launcher. Google documents Ctrl + Alt + T as the way to start it, and nothing needs to be installed first.
- Sign in to your Chromebook. A guest session works too.
- Press Ctrl + Alt + T together.
- Wait for the
crosh>prompt to appear in a new window or tab. - Type
helpand press Enter to list the common commands.
Crosh works without an internet connection. That is deliberate, because a broken network is one of the main things it exists to diagnose.
Methods to access Crosh on different Chromebook models
Every Chromebook brand runs the same ChromeOS, so a Dell, HP, Acer, Lenovo or Google device opens Crosh the same way. What changes is whether a keyboard is attached and who manages the device.
| Your device | How to open Crosh | Why |
|---|---|---|
| Laptop Chromebook from any brand, including Dell | Press Ctrl + Alt + T | The shortcut is built into ChromeOS, not the hardware |
| Detachable or tablet with its keyboard attached | Attach the keyboard, then press Ctrl + Alt + T | Crosh has no launcher icon and no touch-only route |
| Chromebox or Chromebase with a USB keyboard | Press Ctrl + Alt + T on the external keyboard | Any keyboard sends the same key combination |
| Chromebook with a Windows-layout external keyboard | Press Ctrl + Alt + T | Ctrl, Alt and T sit in the same places on both layouts |
| School or work Chromebook | Press Ctrl + Alt + T; if nothing opens, ask the administrator | Admins can disable Crosh by policy |
| You need the full Linux shell | Turn on developer mode, open Crosh and type shell |
Normal mode blocks the shell command |
Pre-requisites for accessing Crosh
| Requirement | Needed for basic Crosh? | Needed for the shell command? |
|---|---|---|
| A ChromeOS device (Chromebook, Chromebox, Chromebase or ChromeOS Flex PC) | Yes | Yes |
| Signed in, or a guest session | Yes | Yes |
| A physical or Bluetooth keyboard | Yes, for Ctrl + Alt + T | Yes |
| Internet connection | No | No |
| An app, extension or download | No | No |
| Crosh not disabled by an administrator | Yes | Yes |
| Developer mode turned on | No | Yes, and switching to it wipes local data |
Back up your Downloads folder before you switch modes. Developer mode erases everything stored locally on the device.
Through the browser address bar
Crosh does not have a documented address that you can type into Chrome. The ChromiumOS documentation says the keyboard shortcut is the only way to reach it.
| What you try | What happens | Use this instead |
|---|---|---|
| Typing a crosh address into the Chrome address bar | No supported page opens Crosh | Press Ctrl + Alt + T |
| Searching crosh in the launcher search | The ChromiumOS VM guide lists the search drawer as a route | Press Ctrl + Alt + T if search shows nothing |
Typing chrome://policy in the address bar |
Shows the policies applied to the device | Use it to check whether an admin blocks Crosh or developer mode |
On certain Chromebook models with hardware buttons
No Chromebook has a hardware button that opens Crosh. Physical buttons only matter when you switch a tablet or Chromebox into developer mode, which is what unlocks the full shell inside Crosh.
| Device type | Button combination | What it does |
|---|---|---|
| Chromebook with a keyboard | Hold Esc + Refresh, press Power (some models use Esc + Full screen) | Opens recovery mode, the first step to developer mode |
| Chromebox | Hold the recovery button, press Power | Opens recovery mode |
| Tablet or detachable without keyboard | Hold Power + Volume Up + Volume Down for 10 seconds | Opens recovery mode |
| Older Chromebooks | A physical developer switch | Turns developer mode on or off |
Enabling developer mode for advanced access
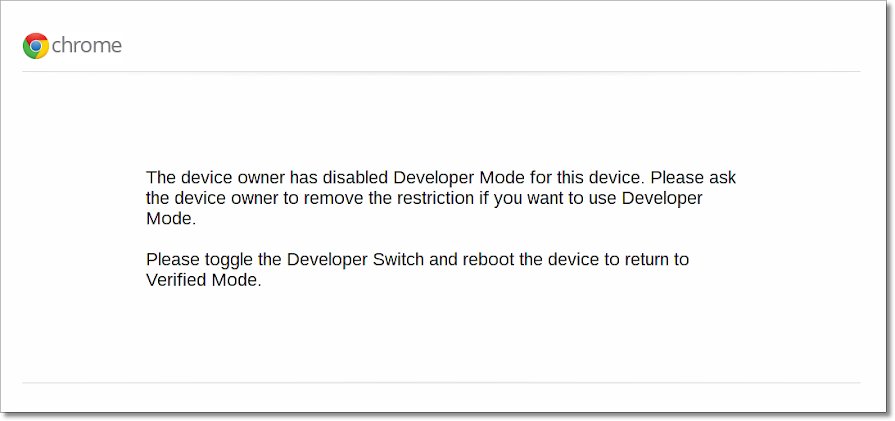
Developer mode is only needed for the shell command and root access. Switching into it wipes all local data, weakens verified boot and is not supported by Google.
- Back up your local files to Google Drive or an external drive.
- Turn the Chromebook off.
- Hold Esc + Refresh and press Power to enter recovery mode.
- Press Ctrl + D, then press Enter to accept.
- Wait while the device wipes itself and reboots, then sign in or start a guest session.
- Press Ctrl + Alt + T to open Crosh.
- Type
shelland press Enter to get the full Linux prompt.
On a tablet, enter recovery mode with the buttons above, press Volume Up + Volume Down together, then select Confirm Enabling Developer Mode. A warning screen appears on every boot from now on; press Ctrl + D to start ChromeOS straight away.
Switch a Chromebook from developer mode back to normal mode
- Back up any local files, because leaving developer mode also wipes the device.
- Restart the Chromebook.
- Press the Spacebar at the developer mode warning screen.
- On a tablet, use Volume Up and Volume Down to select Enable OS Verification, then press Power.
- Set up the Chromebook again after the wipe finishes.
If you made the root filesystem writable while in developer mode, you may need to recover the Chromebook with a recovery image instead.
Accessing Crosh: open, switch and close sessions
Crosh behaves like any other ChromeOS window once it is open. These steps cover a full session, from opening it to closing it cleanly.
- Press Ctrl + Alt + T to open a Crosh session.
- Hold Alt and press Tab to return to the browser without ending the session.
- Press Ctrl + Alt + T again if you need a second, independent session.
- Hold Alt and press Tab to move between open sessions.
- Press Ctrl + W to close the current Crosh tab when you are done.
- Press Ctrl + Shift + W to close the whole Crosh window instead.
Using Crosh commands for troubleshooting and productivity
Crosh is a small, restricted set of troubleshooting tools, not a general Linux terminal. The exact list changes between ChromeOS releases, channels, admin settings and developer mode, so start with the built-in help.
| Type this | What it does |
|---|---|
help |
Lists the most common commands on your device |
help_advanced |
Lists every available command; scroll up to see the start |
help <command> |
Shows help for one command, for example help vmc |
<command> --help |
Another way to show help for one command |
| Part of a command, then Tab | Completes the command name or lists matches |
Common Crosh commands for troubleshooting
A handful of commands cover most first-time Crosh visits. The full Crosh command catalogue is long and varies by device, so treat help_advanced as the authority for yours.
| Command | Use it to | Developer mode needed? |
|---|---|---|
uname -m |
Print the device's processor architecture | No |
vmc list |
See the Linux virtual machines on the device | No |
vmc stop termina |
Stop the default Linux VM when Linux apps hang | No |
vmc export <vm name> <file name> |
Save a VM disk image to Downloads for recovery | No |
shell |
Open the full Linux shell | Yes |
For productivity, the time savers are Tab completion, help <command> instead of a web search, and several sessions open side by side with Ctrl + Alt + T.
How to check that Crosh opened correctly
- Look for the
crosh>prompt at the start of the line. - Type
helpand press Enter; a list of commands confirms Crosh is running. - On a developer mode device, type
shelland press Enter; the prompt should change to a Linux shell prompt. - In normal mode, expect
shellto be refused; that confirms the device is still in verified mode.
Additional tips for Crosh sessions
| Tip | Detail |
|---|---|
| Find shortcuts | Press Ctrl + Search + S to view every ChromeOS keyboard shortcut |
| Remap keys | Open Settings > Keyboard and inputs if a modifier key does not behave as expected |
| Guest sessions | Crosh opens in a guest session, so you can troubleshoot without your account |
| Long output | Scroll up after help_advanced; the list is longer than one screen |
| Developer mode boot | Press Ctrl + D at the warning screen to skip the 30-second wait |
Installing Linux (Crostini) for advanced tools
Crostini, the Linux development environment, gives you a real Debian terminal with the APT package manager. It does not need developer mode and does not wipe the device.
- Select the time at the bottom right of the screen.
- Select Settings.
- Select About ChromeOS > Developers.
- Next to Linux development environment, select Set up.
- Follow the on-screen instructions; setup can take 10 minutes or more.
- Use the Terminal window that opens to install tools with
sudo apt-get install.
Work and school Chromebooks may block Linux. Crosh can still stop or export the Linux VM when the Terminal app itself misbehaves.
Additional tools and extensions to enhance Crosh usage
Crosh is part of ChromeOS and needs no extension. Extra capability comes from built-in ChromeOS tools, not from add-ons.
| Tool | What it adds | When to use it |
|---|---|---|
| Linux Terminal app (Crostini) | A Debian shell where you can install packages and run your own scripts | You need scripting, editors or developer tools |
Developer mode shell |
A full ChromeOS shell, with sudo access |
You need to inspect or change ChromeOS itself |
chrome://policy in the browser |
A list of policies on the device, with Reload policies | You suspect an admin restriction |
| Chrome Web Store extensions | Nothing for Crosh itself | Skip any extension that claims to unlock Crosh |
Using Crosh extensions and scripts
| Question | Answer |
|---|---|
| Does Crosh need an extension? | No. It is built into ChromeOS and needs no install |
| Can Crosh run shell scripts? | Not in normal mode; Crosh only runs its own command set |
| Where do scripts run instead? | In the Linux Terminal app, or in the developer mode shell |
| Can Crosh commands be added by an extension? | No; the set depends on the ChromeOS release, channel, admin settings and device mode |
Browser-based tools for complementary functionality
A few browser pages and built-in apps answer questions that people often open Crosh to ask.
| Built-in tool | Opens with | Answers |
|---|---|---|
| Policy page | Type chrome://policy in the address bar |
Whether Crosh, Terminal or developer mode is blocked |
| Keyboard shortcut list | Ctrl + Search + S | Whether a shortcut still works or has been remapped |
| ChromeOS settings | Select the time, then Settings > About ChromeOS | Your ChromeOS version, updates and Linux setup |
Safety tips and best practices when using Crosh
| Practice | Why it matters |
|---|---|
| Run only commands you understand | Some commands stop VMs or change network state while you work |
| Back up before developer mode | Entering or leaving developer mode wipes local data |
| Leave developer mode off on a daily device | It weakens verified boot and allows unsigned system images |
Never run commands copied from unknown sites in shell |
The developer shell can reach root with sudo |
| Avoid third-party extensions that claim to unlock Crosh | Crosh needs no extension, so such add-ons serve no purpose |
| Respect school or work policy | Admins block Crosh and developer mode for a reason, and bypassing it can breach policy |
Troubleshooting common access issues to Crosh
1. Verify developer mode status when `shell` is refused
Normal (verified) mode blocks the shell command.
- Restart the Chromebook and watch the boot screen.
- If no developer mode warning screen appears, the device is in normal mode.
- Follow the developer mode steps above if you need
shell, after backing up your files.
2. Confirm keyboard shortcuts when Ctrl + Alt + T does nothing
A remapped key, a detached keyboard or the wrong window in focus.
- Attach the keyboard if you use a tablet or detachable.
- Open Settings > Keyboard and inputs and check that Ctrl and Alt are not remapped.
- Click the desktop or a browser window, then press Ctrl + Alt + T again.
3. Check for admin restrictions on a school or work Chromebook
Admins can disable Crosh with a ChromeOS policy and block developer mode through forced re-enrollment.
- Type
chrome://policyin the address bar and press Enter. - Select Reload policies.
- Look for
SystemFeaturesDisableListlistingcrosh, or a developer mode block. - Ask your administrator for access; on a refurbished device, try signing in with a Gmail account first.
4. Update Chrome OS when Crosh commands are missing
The command set changes between ChromeOS releases.
- Select the time, then Settings > About ChromeOS.
- Select Check for updates.
- Select Restart when the update finishes, then open Crosh again.
5. Reset your device when Crosh still will not open
A corrupted local profile or system state that updates did not fix.
- Back up your Downloads folder and other local files.
- Sign out of your Chromebook.
- Press and hold Ctrl + Alt + Shift + R, then select Restart.
- Select Powerwash > Continue and follow the prompts.
Work and school Chromebooks cannot be powerwashed by the user. Contact the administrator instead.
Can you access Crosh on Windows 11 or a Windows PC?
Crosh is part of ChromeOS, so it does not exist on Windows 11, Windows 10 or a Dell Windows laptop. The way to get it on a PC is to run ChromeOS Flex, Google's version of ChromeOS for existing hardware.
| Your computer | Crosh available? | What to do |
|---|---|---|
| Windows 11 or Windows 10 PC | No | Use Command Prompt, PowerShell or Windows Terminal for Windows tasks |
| Dell, HP or Lenovo Chromebook | Yes | Press Ctrl + Alt + T |
| PC running ChromeOS Flex | ChromeOS includes Crosh | Press Ctrl + Alt + T after signing in |
| PC you want to try ChromeOS Flex on | After setup | Create an 8 GB or larger USB installer; Flex can run from USB without installing |
ChromeOS Flex needs an Intel or AMD 64-bit device with 4 GB of RAM and 16 GB of storage. Installing it replaces Windows, so run it from USB first.
How to access Crosh FAQ
How do I open Crosh on a Chromebook?
Press Ctrl + Alt + T while signed in or in a guest session. Crosh opens with a crosh> prompt. It has no icon in the launcher, and nothing needs to be installed first.
How do I access Crosh on Windows?
You cannot. Crosh is the ChromeOS shell and is not part of Windows 11 or Windows 10. To use it on a PC, run ChromeOS Flex from a USB installer, then press Ctrl + Alt + T.
How do I access Crosh on a Dell?
On a Dell Chromebook, press Ctrl + Alt + T, the same as on any other Chromebook. A Dell laptop running Windows does not have Crosh.
How do I enable Crosh?
Crosh is on by default on personal Chromebooks, so there is nothing to enable. On a managed school or work device, an administrator can disable it, and only the administrator can turn it back on.
How do I get into the full shell from Crosh?
Turn on developer mode, open Crosh with Ctrl + Alt + T and type shell. In normal mode Crosh refuses the shell command. Switching to developer mode wipes local data.
Do I need developer mode to use Crosh?
No. Crosh and commands such as help, help_advanced and vmc work in normal mode. Developer mode is only needed for the shell command and root access.
How do I close Crosh?
Press Ctrl + W to close the Crosh tab or Ctrl + Shift + W to close the window. Hold Alt and press Tab instead if you want to leave Crosh running in the background.
Why does Ctrl + Alt + T not open Crosh?
The usual causes are a detached keyboard, remapped Ctrl or Alt keys, or an administrator policy that disables Crosh on a managed Chromebook. Check Settings > Keyboard and inputs, then chrome://policy.
Conclusion: when to use Crosh and when to use Linux
Open Crosh with Ctrl + Alt + T for quick troubleshooting and VM control, and set up the Linux development environment for everyday command-line work. Crosh needs no setup and works offline, but its command set is restricted. Linux gives you a full terminal without the data wipe and security cost of developer mode.

![Dual boot Linux Mint and Windows 10 or 11 [beginner’s guide]](https://techdows.com/wp-content/uploads/2026/10/Linux-Mint-live-session-desktop-with-the-application-menu-open.jpg)
![Microsoft refund : Store & Xbox A-Z refund guide [2026]](https://techdows.com/wp-content/uploads/2026/10/Xbox-Support-Request-a-refund-for-digital-games-page-with-Sign-In-button-600x338.jpg)
![How to use a laptop screen as an external monitor [tutorial]](https://techdows.com/wp-content/uploads/2026/10/macOS-Displays-settings-with-an-iPad-added-as-an-extended-display-600x338.jpg)